Lightroom users often want to remove groups of images efficiently without losing essential originals or creating clutter in catalogs. This guide compiles practical steps and considerations for deleting multiple photos in Lightroom Classic, while preserving control over the files on disk and within the catalog.
Understanding the delete workflow
In Lightroom, you can delete photos from the catalog and optionally move the corresponding files to the Trash or Recycle Bin on your operating system. The behavior depends on the actions you choose in the delete dialog and the surrounding settings.
When you select Delete from Disk, Lightroom will remove the selected photos from the catalog and also delete the actual image files from the filesystem. It is generally advised not to delete unprocessed original files from the catalog, as you may want to reprocess or revisit them later. You can toggle between different filter and metadata options to identify exactly which JPEGs or enhanced files you want to remove.
Preparing to select files for deletion
Start by filtering to identify the exact set of images you want to delete. Use the filter bar to select Text or Metadata filters, and search for JPEG files or other designations that help you isolate the target group. For example, filter by file type and extension (jpg or jpeg) or by naming conventions used during your shoot. This helps ensure you are deleting only the intended files, not more than planned.
In grid view, you can quickly select multiple images to reject by using multi-select methods. If you shoot a day’s worth of images and want to remove all the JPEGs after processing DNGs, apply the appropriate filters to isolate the JPEGs, then select the batch you wish to remove.
Deleting from Lightroom catalog and disk
To delete the selected photos, initiate the dialog that provides the option to Delete from Disk. If you want to keep the original unprocessed files in Lightroom for potential future reprocessing, avoid deleting from disk and instead delete only from the catalog. The dialog also clarifies whether to move items to the Trash/Recycle Bin or to permanently delete.
Note: You can only undo this action with a specific undo operation in Lightroom, not after the files have been permanently removed. If you need to undo the deletion, act quickly and use the Undo command where available.
When deleting, you may be prompted with choices about whether to remove photos from a collection or from All Synced Photographs. If you want to retain access via mobile devices, you might choose to remove only from the collection but keep the images in All Synced Photographs. Lightroom can remember your default behavior if you check Don’t show again and select your preferred option for future deletions.
Keyboard and context options for deletion
In Grid View or Loupe View, you can trigger deletion with keyboard shortcuts. For example, the Delete/Backspace key opens the deletion dialog for the active photo (and, depending on Lightroom’s current state, may apply to all selected photos). Mac and Windows shortcuts exist to move items to the Trash or Recycle Bin and to remove them from the catalog and disk. Right-click (or Control-click on Mac) offers quick actions such as “Go To Folder in Library” to verify file locations after deletion.
Consider the default behavior you want for subsequent deletions. If you want Lightroom to automatically apply your chosen deletion behavior in the future without prompting, use the Don’t show again option in the dialog and set your preferred action.
Practical tips for managing duplicates and clutter
Some users explore plugins like Duplicate Finder to identify and manage duplicate files. While not required, these tools can help reduce clutter and ensure that duplicate JPEGs or similar crops don’t survive in your catalog. Always back up before performing bulk deletions, especially when working with large shoots or nightly batches.
If you are unsure about a batch, consider creating a temporary collection for the day’s JPEGs. After verifying which files should be removed, perform the deletion with the appropriate option to remove from disk or only from the catalog, depending on your workflow goals.
Summary of practical steps
- Filter to isolate the target group of photos (e.g., JPEGs or enhanced images).
- Select the batch you intend to delete in Grid View.
- Choose Delete from Disk if you want the files removed from the filesystem as well as the catalog, or Cancel to preserve originals.
- Decide whether to remove from a collection or keep in All Synced Photographs, based on your mobile access needs.
- Optionally use keyboard shortcuts or right-click to access location verification and deletion options.
- Always consider backing up before bulk deletions and avoid deleting unprocessed originals unless you are certain they are no longer needed.
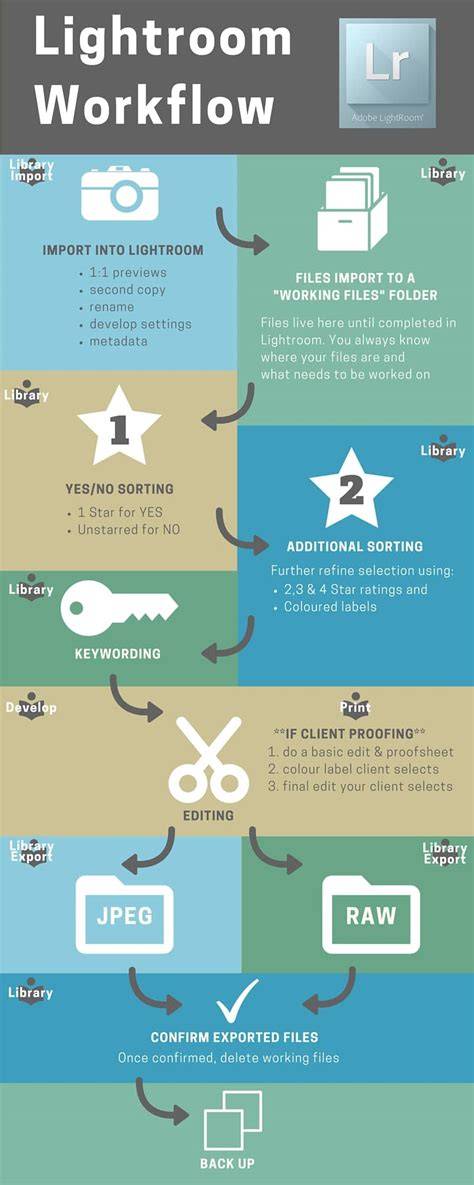
Removing and Deleting Photographs in Lightroom Classic
By applying these steps thoughtfully, you can efficiently manage daily shoots, keep your catalog clean, and ensure you retain the flexibility to reprocess if needed.