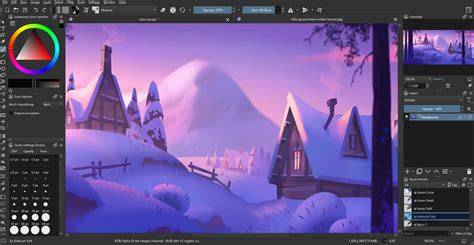
Krita is a powerful open-source digital painting program known for its versatility and rich feature set. Unlike vector-based programs designed primarily for tracing, Krita is raster-based but still offers tools that allow you to trace images effectively. Tracing in Krita involves overlaying your original artwork or sketch and using specific settings and tools to create crisp, clean lines.
Understanding Krita's Tracing Capabilities
Krita offers a customizable workspace with over 30 dockers for extended functionality, a variety of brush engines, and dedicated tools that support tracing workflows. The interface is designed to be intuitive yet powerful, with the ability to save your setup as a personal workspace and create shortcuts for commonly used tools. While Krita does not auto-trace like vector software, its brushes, stabilizers, and assistants provide precise control for manual or semi-automatic tracing.
Preparing Your Artwork for Tracing
Before you begin tracing, ensure your original artwork is scanned or photographed with good lighting and clarity. Import the image into Krita by selecting File > Import > Import as Layer or simply dragging the file onto your canvas. Once imported, reduce the opacity of your original layer to make tracing easier and add a new transparent layer on top where you will create your traced lines.
Setting Up a Practical Tracing Workspace
Customizable layouts allow you to tailor Krita to your tracing needs. Consider arranging tools such as Brush Tool, Line Art Tool, and Vector Tool on accessible docks, and enable a light or dark theme for comfortable long sessions. You can also enable the Assistant Tool to help with vanishing points and straight lines, and pair it with brush stabilizers to smooth out your strokes.
Using the Assistant Tool and Stabilizers
Krita offers assistants that help you draw precise lines and shapes. While not automatic tracing, these tools help replicate curves and lines cleanly. Additionally, the brush stabilizers smooth out your strokes, which is essential when tracing manually. After applying these tools, you can clean up the lines and convert them into your line art layer.
Choosing the Right Tools for Tracing
The Brush Tool provides a versatile, natural drawing experience suitable for tracing. The Line Art Tool is ideal for creating clean, precise lines, and the Vector Tool can produce scalable, editable paths for shapes that may need resizing later. Importantly, the Vector Tool exports to SVG when vector output is required, though Krita itself focuses on raster workflows.
Working with Layers and Guides
1) Use Layers: Working on separate layers allows you to make adjustments without affecting the entire artwork. 2) Adjust Opacity: Lower the opacity of your reference layer to see your tracing more clearly. 3) Use Guides: Krita's grid and guide tools help align your tracing accurately. 4) Practice: Tracing is a skill that improves with time and repetition.
Practical Tracing Steps
1. Create a new document in Krita and set the canvas size to match your artwork. 2. Import the scanned or photographed drawing and reduce its opacity. 3. Add a new transparent layer on top for tracing. 4. Choose the Brush Tool for natural lines or switch to the Line Art Tool for crisp edges. 5. If needed, use the Vector Tool to create scalable paths. 6. Use the Assistant Tool to aid with shapes and straight lines. 7. Zoom in to refine details and adjust stroke weight as you go. 8. Save your tracing in Krita's native .kra format for future editing, or export as PNG for sharing. 9. Consider exporting as SVG if you created vector paths and need vector output.
Exporting and Finalizing Your Traced Artwork
When tracing is complete, export your work as a high-resolution PNG or PSD to preserve layers. Krita supports a variety of file formats for importing and exporting tracings, including JPEG, PNG, TIFF, and its native .kra format. If you created vector elements, you can export as SVG, though Krita emphasizes raster workflows.
Tips for Effective Tracing in Krita
- Use Layers: Separate reference, line art, and color layers to maintain flexibility.
- Adjust Opacity: Lower the reference layer opacity to better see your tracing.
- Use Guides: Rulers, grids, and guides help maintain proportion and alignment.
- Practice Regularly: Tracing improves with consistent practice and experimentation with tools.
Analyzing Tracing in Krita for Digital Art Creation
Tracing in Krita blends technical control with artistic intent. The workspace customization allows artists to optimize their tracing flow, while the brush engines and stabilizers offer a broad range of effects. Although Krita does not automatically trace like some vector programs, its robust set of tools supports precise, efficient tracing that can accelerate the transition from sketch to polished line art.
For comics or detailed line work, Krita's vector capabilities enable clean panel borders and speech bubbles when used creatively with the vector tools and built-in libraries. The ability to import brush and texture packs expands the toolkit, and the resource manager makes it simple to bring in assets from other artists or create bundles for personal use. This flexible approach ensures tracing can be integrated into a wide variety of artistic styles.
FAQs and Common Scenarios
- Can Krita automatically trace images like vector software? No, Krita does not have a built-in automatic vector tracing feature.
- Can I convert my traced art in Krita to vector format? Krita itself does not support vector export broadly, though some vector-like paths can be created with the Vector Tool and exported as SVG in specific workflows.
- What are the best tools for tracing detailed line art? The Line Art Tool and the Brush Tool are highly effective for tracing detailed lines.
- How can I adjust the opacity of my reference layer? Select the layer in the Layers panel and use the Opacity slider at the top of the panel.
- How do I use guides to align tracing accurately? Go to the View menu and select Guides; create guides by dragging from the rulers to align with your drawing.
Additional Considerations for Tracing with Krita
Krita's support for HDR painting, GPU acceleration, and color management ensures your traced lines maintain quality across various workflows. The approach to tracing often blends manual strokes with stabilizers, assistants, and reference layers to achieve precise results aligned with the artist’s vision. As you gain familiarity with Krita's tracing tools, consider building a customized workspace that mirrors your ideal tracing process, then save it as a unique workspace for quick access in future sessions.