I’ve always loved the look of photo collage gallery walls, but not the cost. Buying a whole bunch of frames is pricey, and then hanging them all - and trying to make sure they are evenly spaced and not crooked - is a huge hassle. Foam core board is super inexpensive, has a great minimalist look, and is very lightweight so it’s easy to hang on the wall using picture hanging strips or photo mounting putty instead of nails. Instead of placing each photo in a frame, I adhered them to a square of foam core board, which gives the look of a frame without the cost.
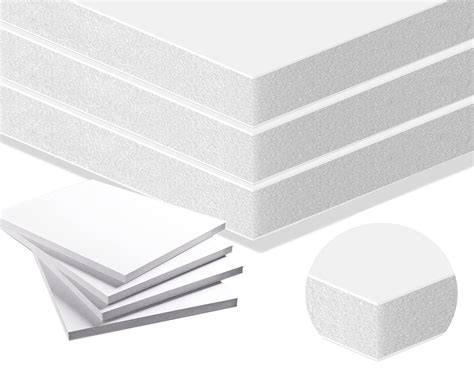
You can buy cheap foam core at the dollar store for a dollar per board (which makes 6 squares of this size) OR you can really splurge and get nicer quality board at Walmart for about $1.80 per board. Either way, each foam core square is only going to cost about 30 cents plus the time it will take you to cut them. Using foam core to make a gallery wall will definitely save you money, but it will require effort AND you’ll need a few additional supplies. If you don’t want to take the time, or you don’t already have things like a large ruler and cutting mat, you might just want to look into an online service that will send you preprinted photo tiles. But if you like making things, already have basic craft supplies, and don’t mind a little elbow grease, this is a great project.
Materials and cost
Just be aware that if you decide to do LOTS of photos like I did (28), you’ll spend a couple of hours just cutting the foam core board and adhering photos to it. If you already own a large ruler, cutting mat, and exacto knife, your cost will stay quite low for this project. Cutting the foam core boards into squares is the most time consuming part of this project. You MUST have a new, sharp blade on your exacto knife to get really smooth cuts in your foam core board. If the edges of your foam core boards look good, with no nicks or crunched corners, you can just cut each 20×30 foam core board into six 10 inch squares. When you are using a large ruler and cutting board, you will want to line everything up, then lean forward on the ruler with your entire forearm. Please remember that YOU WILL mess up on a few of your cuts. That’s ok, and you’ll get better at it as you go along. So purchase a few more boards than you think you will need - they’re cheap!
Step-by-step: making foam core collage squares
Also, foam core board is pretty sturdy, but it’s not indestructable, so don’t press down on it super hard. Using an exacto knife with a very sharp blade, cut the foam core boards into 10 inch squares (you can get 6 from each 20x30 inch foam core board). Please note that if you would like to trim the outer 1/4 inch off your foam core, like I did, you will need to cut 9.75 inch squares. Use tape runner adhesive to adhere each photo into the center of a foam core square. If you want to be exact, the easiest way to do this is to lay the photo down on a foam core square and get it centered. Then lift just the right side of the photo, while holding the left side in place, and used the tape runner to add adhesive on the foam core square under the right side of the photo. Press the right side of the photo down, then lift the left side and add adhesive on the foam core square on the left side. DO NOT press hard with the tape runner or you can dent the foam core board. Alternately, you can just flip over the photo and place adhesive around the edges on the back side, then place the photo in the middle of the foam core square. Your photos are now ready to be hung on the wall.
Mounting and layout
You can use whatever mounting product you prefer, such as Command picture hanging strips or photo mounting putty. To use picture hanging strips, press together the velcro sides of two strips. Remove the backing from one side, and place the strip down on the back of the foam core board. I recommend using 2 sets of strips on each photo board. Prep your wall by measuring and marking where the photo collage will go. Place masking tape on the wall at the height you want the bottom row of photos to go. Make sure that line of masking tape is level. Then measure 9.75 inches up from the first line of masking tape to place your second line of tape (or 10 inches up if your squares are 10 inches). Continue until you have marked all your rows of photos. Mount your first photo on the wall by removing the remaining backing from the picture hanging strips and pressing the photo to the wall. Continue mounting photos in the collage, using the width of the masking tape roll to determine how far apart each photo should go. When all the photos in your collage have been mounted, remove the masking tape.
Practical tips for a polished look
- Prep your wall and plan spacing with masking tape lines to ensure even rows.
- Use a level to keep the bottom row perfectly horizontal.
- Have a few extra foam boards on hand in case you need to swap photos.
- Keep photos centered on each square for a clean, cohesive gallery.
Want to go digital or quicker?
If you don’t want to take the time, or you don’t already have a large cutting mat and exacto knife, you might explore online services that print photo tiles or preprinted collage options. Alternatively, you can design a collage on your computer using software such as Canva, then print and mount physical copies or order ready-to-hang prints.
Step 4. If you do not yet have art for some frames then this is the time to choose it! Etsy is a great source for inexpensive and quick art. You can buy a .jpg and then have it printed yourself at Staples, which is a very affordable option. If you’re feeling stumped, just start selecting things you like from Etsy or another poster or printable site, and inserting them into a power point slide as shown below. Step 5. Make sure not to hang your art too high. Art should be eye level when standing, not above your head. The center of a collage wall should be 4′ - 4.5′ from the floor. Step 6. Measure where on the frame the hooks are, then use a sharpie to mark on the wrapping paper where the nails should go. Happy (art) Hanging and Happy Hosting!
Additional notes for a cohesive style
Think about how much space on the wall you’d like the collage to cover. It’s ideal if for the items to cover about 2/3 of the open space. If you’re hanging your collage above a sofa, then make sure at least 2/3 of the space centered over the sofa is full of items.
Step 2. Buy New Frames. If you’re incorporating some vintage treasures into your wall, yay for you! Do some thinking about what additional new pieces you’d like to add to your collage wall, and how they will work together. Step 3. Play around with the frames and art on the floor next to the wall. It may be helpful to use painters tape on the floor to represent the area you’re trying to cover. Step 4. If you do not yet have art for some frames then this is the time to choose it! Etsy is a great source for inexpensive and quick art. You can buy a .jpg and then have it printed yourself at Staples, which is a very affordable option. If you’re feeling stumped, just start selecting things you like from Etsy or another poster or printable site, and inserting them into a power point slide as shown below. Step 5. Make sure not to hang your art too high. Art should be eye level when standing, not above your head. The center of a collage wall should be 4′ - 4.5′ from the floor.