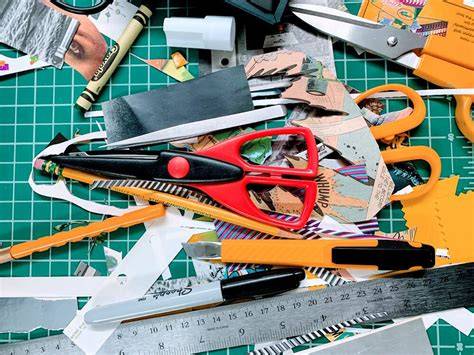
There are so many reasons to love the art of collage, from the freedom it allows to the powerful stories that can be told through it. In the classroom, I love the fact that students can mix personal items and traditional materials to create something new and uniquely meaningful. And the fact that students don’t feel intimidated when they are encouraged to collage?
I use collage techniques in many of my lessons. This lesson not only has students experimenting with the art of collage, but it also has them thinking deeply about composition. It’s a great primer to get them experimenting with visual storytelling. I begin the lesson by discussing the art of collage. It’s also a good idea to provide some examples by sharing master collage artists. Artists I’ve used in the past include Georges Braque, Picasso, Kurt Schwitters, Romare Bearden, Radcliffe Bailey, Richard Hamilton, and Robert Rauschenberg. These artists and their works lay the foundation for a wonderful class discussion.
There are many themes teachers can use when collaging with their students, but for this specific lesson, I stick with the theme of “self.” I tell students they will be creating a type of “self-portrait” collage. Instead of a traditional portrait, however, they will use colors, textures, magazine images, text, fabrics, photos, and maybe even a few special items from home. After the theme has been set, I give students a “think sheet” to help them dive deep into what makes them unique and help them brainstorm useful imagery to locate. This acts as a type of mental map for their art piece. I usually allow students a few days to search for imagery. They have so much fun with this step!
Be sure you don’t limit your students to magazine imagery only. After students have a variety of items to work with, it’s time to create their “self” collages! Many students choose to collage onto a flat surface, like posterboard or cardboard. However, I don’t limit them to these materials because often they find objects to collage on top of which adds to their visual stories. Once these awesome collages are complete, students take a 3” x 3” sticky note, fold it in half and cut a small viewfinder out of it. This viewfinder is then placed on top of the collage so students can find new compositions within their collage. Students are so excited to see these new compositions and find the gems of imagery that appear when they look closely.
As a final step, I have my students combine their collages and paintings into one display. My students mount their paintings onto poster board and consider how they want to add their collage. This is one of my students’ favorite projects because they have so much freedom to create an artwork with such personal meaning. Magazine articles and podcasts are opinions of professional education contributors and do not necessarily represent the position of the AOEU or its academic offerings. Debi West is one of AOEU’s Adjunct Instructors and a former AOE Writer and NBCT art educator. Does anybody else have some commitment issues? If so, you aren’t alone!
One of my favorite things about making collages is that two people could start out with the exact same images, but they would put together completely different pieces of artwork! I always recommend having your phone close by on Do Not Disturb (so you don’t interrupt your flow) and taking pictures as you go. This also allows you to step away from your project if you need to for a little while. As long as you’ve taken enough photos of your process, you can pack up all the magazine images in a baggie and tuck them in your sketchbook for later. Sometimes I’ll do this if I run out of time, other times I’ll do it if I need to pick up a few more magazines to flip through. Plus, this always makes for great process photos to share on social media!
It’s so fun to talk about the art process this way, and also to journal about what was going through your head as you were working. Once you’ve got a composition you love, you can start gluing layer by layer. (And remember our collage adhesive pledge: “I will always, always, always use a glue stick when creating a magazine collage.”) Here’s the thing about art, it’s completely subjective. What one person loves, another person hates. Recently I saw a graffiti artist who had spray-painted Cambell's can of soup that said, “If this was a Warhol, you’d buy it,” and really, I had to chuckle at its truth. Don’t think about making art, just get it done. Let everyone else decide if it's good or bad, whether they love it or hate it. The more collages that you make, the better you’ll get at your process of choosing, cutting, tearing, piecing, layering, and gluing. I hope these tips helped boost your confidence and I’d love to see what you create!
You can start collaging if you’re curious, because collage is a great thing for beginners, easy and fun to be creative. The only difference I’ve noticed is with the glossy pages and matte ones; I’ve mostly used glossy pages from fashion magazines, National Geographic, and similar. Any type of scissors will do. I use ordinary scissors and that’s why my images aren’t usually fussy cut to perfection. It’s a great cutting tool if you have enough healthy nerves to use it. I can only use it on certain occasions. It seems I cut too slowly with an X-acto knife. You, on the other hand (if you’re a patient person), can use this knife to really cut out your images in detail. Lastly, if you’re going to use an X-acto knife, you need to have a cutting mat of some kind. Otherwise, you’ll ruin the surface you’re working on. This is a must. You can’t make collages without some sort of glue. This is the most basic collage material you’ll need. And you can start collaging if you only have a glue stick. But remember, your surface needs to be the right one for a glue stick. Mod Podge is a decoupage medium that can be used in collage as well. Unlike PVA glue, it is easily spread out with a brush and is thin. I’ve used this collage medium for a long time and I can say it’s a neat thing to have for collage. It will also seal your papers. You might be surprised that you find acrylic paint here. However, when you put a thin paper on top of wet acrylic paint, it’s going to stick. When acrylic paint dries, it acts as glue, it keeps any paper you stuck to it. However, the paper is probably going to wrinkle. But this can have a great effect on your collage. A glue gun is an excellent tool if you want to glue down heavier elements like buttons or lace. This is one of my favorite adhesives for collage. Double-sided tapes are usually strong, so fixes are harder to do. Everyone is in love with washi tape. They’re cute and easy to use, and you can choose from many different designs. What I usually do is glue my image down with stronger glue and then add washi tape for the corners of my images, or to connect two pieces of paper together. We mostly used it in school projects, but if you have this one in your stash, you can still use it. I don’t know the official name, but this is any tool you can use to spread the glue evenly once you’ve already glued down the image. No matter the size of your fingers, it’s usually hard to adhere tiny collage pieces and do it perfectly. That’s why I use craft tweezers. This is an amazing tool to have if you want to glue down thicker and heavier elements like buttons or feathers. I usually use a collage brush with liquid glue such as Mod Podge and collage medium. If you want to cut perfect lines quickly, use a ruler and an X-acto knife. A cutting mat is only necessary if you’re using an X-acto knife. They come in different sizes and shapes. These are my suggestions for starting with collage.
1. If you’re into collaging, then you collect images all the time. It’s not just before a project. When people want to throw out wrapping paper, I take it. If you don’t have time and will to cut out things all the time, just collect them, and you can cut them out in detail later. Collecting collage elements can be tricky and you can find yourself overwhelmed with all the bits and pieces. So, good collage organization is always a plus.
2. The way you’re going to cut them out depends on your style and preferences. All of these methods are interesting in their own way. You decide which look you like better. Or, use all of them. Besides collecting elements, deciding on composition is also fun.
3. Composition is important in collage-making. It dictates how you’ll arrange the elements, their colors, size, and where to place them. What color combinations am I going to choose? (eg. How many visible elements will I have? How will I make the background? Where can I place my main element so it pops out from the rest of my collage? Look, this doesn’t have to be complicated. If these questions seem too much for you, skip them. Use only one question from above and focus on that.
4. If you want to layer things, place elements on top of each other, and leave the parts of the bottom layers also visible. This is a neat idea and can be really cute-looking. What I usually do is outline my fashion magazine images with a white Posca pen. This is especially great for images of people. When I use a magazine image of a model, I often draw on her face. These are marks or symbols I love. You can also add marks on hair, tattoos on arms or legs, etc. If you’re into art journaling, you can add writing to your images. For example, sometimes I journal on the clothes of a woman, her hands, and even her hair. I suggest Posca paint pens and Micron pens.
5. After you’ve decided where everything should go, slowly start gluing the images down. There’s no right or wrong way to collage. It’s all about personal expression and what brings you joy. Don’t overthink. Play with colors, textures, and shapes. Leave some “white space” if it feels overwhelming. You don’t have to cover the whole page/paper. Leaving some white/empty space is actually pretty cool. I feel there are no limit with collage. You can create whatever you want, in an infinite number of combinations. Create a vision board in your art journal. Use images, photos, paper scraps, stamps, whatever you want. Make a memory collage with old tickets, photos, and notes. It can be really fun. Use only black-and-white materials for a minimalist look. Oh, I love this idea. It looks messy. So what? Let it look messy. You can’t be an expert at the very beginning. Show yourself some grace. The more you experiment and try things out, the better your collages will be. Embrace imperfection!
I’m scared to ruin my journal. You can’t ruin it. It is there for you and your exploration. You’re not selling it, exhibiting it, or anything like that. Collaging is about experimenting and having fun, not perfection. By experimenting, you’ll learn so much. You can share your creations online to connect with the collaging community and even ask for a feedback. I love writing about experiential/existential realms, but in this post I want to get practical. When I started to make collages I had NO IDEA what I was doing at all, I just knew that I needed magazines, scissors and glue. For me it was a practice of figuring things out, which was great. At the same time I wish I’d had some pointers. Writing these tips, I realize that they are essentially catered towards artist that want to create a seamless, well-blended collages to create worlds that seem like they exist somewhere in the style I use (vs. the ripped aesthetic that can also be super cool).
1. Get really thrifty. A surprising amount of time goes towards sourcing magazines. I love National Geographics for my pieces, and I’ve been loving the older ones, from the 40s and 50s (which are harder to find and usually more expensive). I also use Life magazines and optical illusion books. Craigslist/Ebay will have some, but I usually prefer to find them in thrift shops/flea markets all over the world as I’ve always had a thing for nostalgia. This way I can also see what imagery I’m buying, and the materials tend to be cheaper in thrift shops than online. I actually started my body of collage work after I went hiking and stopped at an antique store. I randomly picked up a vintage LIFE magazine, and got fascinated by the imagery. I tend to befriend the owners of these stores, and ask them to be on the lookout for a specific type of magazine that I’m looking for.
2. Match textures. I try to only use materials that have the same texture in one collage. So I would never use a vintage image on thin paper with something that I cut out of a thicker catalogue. To me, it will make it stand out too much, when I aim for an even texture and a well-blended piece.
3. Don’t ditch the scissors. I know a lot of collage artist use exactoknives but I actually barely do. I’ve found scissors to cut much more precisely, especially very thin paper. Weirdly my preference is singer sewing scissors. If you place points of interest in the intersections or along the lines, your composition becomes more balanced and will enable a viewer of the image to interact with it more naturally, as studies show.
4. Cut inside of the lines. When you cut out any given shape or figure, don’t cut on the edges exactly - cut off a little of the line that separates a shape from its background. That way, when you add the shape into a new environment, the new composition will naturally create an edge to that shape. That way, it all blends better.
5. Use a circular cutter to make your own planets. Another collage artist gave me this tip and it has proved infinitely helpful. You don’t need to find planets all the time if you’re into spacey imagery like me. You can also use pretty much any sky background or solid color with some texture for a DIY planet if you have a circular cutter.
6. Know when to use your exacto. I used to apply stencil methods to try to integrate part of a figure into a given landscape. The deer is the point of interest here. 7. Rule of thirds. My collages definitely depict dreamscapes that have a foreground, subject or point of interest, and background. I have a photography background, so the rule of thirds is something that I use without noticing all of the time, as its gotten so engrained into my visual sensitivities. To apply this, you would break the image down into thirds (both horizontally and vertically) so that you have 9 sections.
8. Repeat colors and 9. Repeat lines/forms. I tend to create a feeling of looking inside, and blurring lines between the subject and her environment. See how the color of my subject’s shirt is reflected in the pinks in the trippy sky visuals he’s looking at? Repeat lines and forms by using pre-existing lines and shapes and matching them across the piece. These techniques become increasingly intuitive with practice.
10. As artists we seek freedom to express, and real freedom is often found in the ability to have your own boundaries but still feel infinite within. Spray adhesive, glue sticks, and the right glues matter. When I spray my images from the back, I hold the image about 1-2 feet away for even adhesion and easier adjustments. By the end, you’ll have a cohesive set of collages with a range of papers and textures. The process photos you take along the way are great for sharing and journaling your thoughts.
Before you start cutting, it is worth gathering more than just paper. Some of the most striking collages come from mixing paper with texture: wool roving, scraps of hand-dyed yarn, linen thread, or a few inches of ribbon pulled from a skein. Craft suppliers stock the kind of fiber materials that add real dimension to a flat page, and a small bag of leftover yarn ends goes a surprisingly long way across several projects. It also helps to treat collage making as a ritual rather than a task. Clear the table, put on music, light or spray something that smells good, and let the search through magazines slow you down. Brands like Free Yourself build their entire approach around scent as a way to mark a moment and settle into it, which is exactly the mindset that turns collage into something restorative instead of one more project on the list.
Animal Collage: Arguably the best material to use for collage-making is old magazines. I love using National Geographic magazines, travel magazines, and others that have photos of Earth’s natural beauty. I also look for science magazines with pictures of galaxies and planets. It is a great idea to have different types of magazines to choose from. I have also used picture books from Goodwill for my collages. Pro TIP: When making a collage, it is always best to use thick paper or cardstock, such as watercolor paper, cardboard, or poster board.