Procreate’s Brushes system is deeply integrated with the Files app, offering flexible ways to manage, rename, and organize brush libraries, sets, and individual brushes. This guide compiles the essential steps and tips to rename brushes on iPad, using the brush studio, Files app, and related workflows to keep your toolkit neatly organized.
Accessing and organizing brush libraries
There are two ways to access your brush libraries. Brush libraries are now stored in the Files app, either in On My iPad → Procreate → Brushes or iCloud Drive → Procreate Brushes. You can import individual .brush files by bringing them into a brush set folder in the Files app.
Because brushes, brush sets and brush libraries are now files and folders, certain characters cannot be used in names due to operating system restrictions. Procreate’s Brushes system is now integrated with the iPad's Files app, when you make changes to brushes in Procreate the changes will also be reflected in Files, and vice versa.
Open up Files and head to iCloud Drive → Procreate Brushes or On My iPad → Procreate → Brushes (depending on what brush storage you have selected in Procreate) and rename a brush library, brush set, or brush from in here.
Renaming brushes and brush sets
In versions prior to 5.4, you could rename a brush from About this Brush in Brush Studio. To rename a brush set, tap it twice (or tap and hold) and select Rename. You can also rename brushes from the Files app. This provides flexibility if you want a consistent naming convention across Procreate and Files.
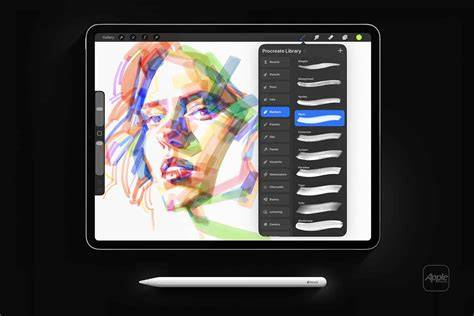
Tap on a brush set to browse the brushes it contains. The brush list displays the name of each brush and a preview of the stroke it makes. To rename a brush or a brush set from within Procreate, use the Brush Studio or the brush library context menu as described above. If you want to rename a brush library, first locate it in the Files app and use the rename action there.
You can have an emoji as the icon for your brush set. To do this, first ensure you don't have an icon set for your brush set. Procreate will use the first emoji in the brush set name as the icon for the set.
Creating, duplicating, and moving brushes
Tap 'Create new brush' to create a new brush and open up the Brush Studio. If you tapped 'Create new brush', you'll be sent to the Brush Studio to customize your new brush. The Brush Studio offers you total control over each aspect of your brush. Here you can alter shape, grain, behavior, color, responsiveness, opacity, taper, and so much more. With hundreds of settings on offer, you can create limitless combinations. Procreate always remembers your settings.
To duplicate a brush, swipe left on it and tap Duplicate. To duplicate a brush set, tap twice on any set then tap Duplicate. An exact copy of the set will appear below the original.
To move brushes and brush sets between libraries, tap and hold the brush or brush set to pick it up, then drag to another library. You can move multiple brushes or brush sets by lifting the first item and then adding others to the stack with another finger. A green icon will indicate a stack, and a counter shows how many items are in the stack. When moving between libraries in Procreate 5.4 and above, the operation moves the files rather than copying them.
Managing, sharing, and backing up brushes
To share an individual brush, swipe left on the brush thumbnail and tap Share. To share a custom brush set, tap the set twice and select Share. If you are looking to back up your brushes or brush sets, consider saving them to an iPad-compatible external hard drive, or a dedicated spot in a cloud service.
If you delete a brush or Brush Set, it will be permanently removed from both Procreate and Files. Always ensure you have backed up any important brushes and Sets before deleting. If you do accidentally delete a brush, set, or library, head to 'Recently Deleted' in your Locations in the Files app.
Working with brush history and favorites
Find your Recent brushes at the top of the brush library sets. Access these brushes by tapping Paint, Smudge or Erase and then tapping Recent. To find the original set a brush in Recent belongs to, swipe left on the brush and then tap the Find button. To pin a brush, swipe left on the brush in your Recent set and tap the Pin button. This will keep the brush permanently at the top of your Recent set. You can easily identify pinned brushes by the pin symbol in the top right hand corner. No longer need a pinned brush, or want to delete a brush from Recent? Swipe left on the brush in Recent and tap the Clear button.
Importing, updating, and resetting brushes
Import a brush library from the Files app. To reset a brush in Procreate, you must enter Brush Studio. In the brush library, tap the button to open the context menu. You can also import new brushes from outside the app. Locate a new .brush, .brushset or .brushlibrary file in Files. A set called Imported is created when you import a single brush.
Because Procreate now syncs with iCloud, you will require an internet connection to sync your brushes with iCloud if you opt to store them there. When you move brushes and brush sets in Procreate 5.4 and above, this movement is a true transfer, not a copy, between libraries.
Tips for staying organized
- Keep brush names simple and avoid characters restricted by the files system to prevent sync issues.
- Use consistent naming for brush sets to make searching easier across Libraries and Files.
- Back up brushes regularly to external storage or a cloud location to prevent data loss.
Exploring Stabilization in the Brush Studio | Learn to Procreate
Quick reference: common actions
- Tap a brush set to view its brushes; the brush list shows each brush name and a stroke preview.
- Tap 'Create new brush' to open Brush Studio and customize new brushes.
- Tap and hold a brush or brush set to access Rename or move options.
- Swipe left on brushes to Delete or Share; swipe left on Recent brushes to Pin or Clear.
- Drag items between libraries to reorganize; holding a brush and another finger adds to a stack for bulk moves.
Example brush library and set overview
Discover the core brush sets that form Procreate’s library, ranging from clean line work to painterly textures, inks, and natural media. Each set offers a variety of brushes, some realistic, some fantastical, designed to cover practical drawing, inking, watercolor, and digital painting needs. Experiment with different brushes to explore what's possible and to tailor your toolkit to your preferred workflow.