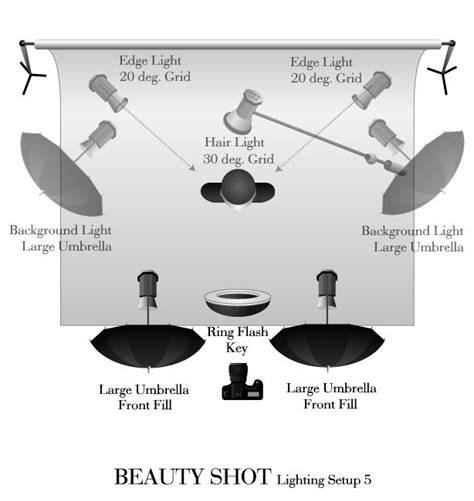
iPhones are renowned for their exceptional camera quality, and with the right natural light and editing tools, you can elevate your photos and videos to the next level. The iPhone’s built-in editing tools are surprisingly powerful and user-friendly. Good photography is all about capturing light in the best way possible. Before you even tap the photo button on your phone, there are several things to consider to ensure you have the best lighting. Whenever possible, utilize natural light. Minimal light available? Get a ring light! Be mindful of where the light is coming from. Flash can be helpful in low light, but it’s often harsh and direct. Portrait mode, ideal for beauty professionals, especially with ring light use when indoors, is great for shots of nails and facial details. It blurs the background, emphasizing the sharp focus on details like nail art, skin, brows, lips, or lashes with enhanced texture and colour.
To begin editing, open your photo or video in the Photos app and tap on the “Edit” button in the upper right corner. This reveals a suite of tools that can transform your media.
Smart editing automations
Auto Enhance (the magic wand) is your go-to for an instant photo upgrade. It intelligently adjusts light, color, and contrast, making your photo pop when you don’t have time for manual adjustments.
Exposure lets you modify the lightness or darkness of your photo, which can be crucial in underexposed (too dark) or overexposed (too light) images. Brilliance, on the other hand, enhances the richness and details, making the photo appear more vibrant and lively.
Highlights help you recover details in the overexposed areas, while Shadows do the same for underexposed sections.
Contrast can make your photo appear more dynamic and engaging by deepening the differences between light and dark areas. Brightness alters the overall light level, while Black Point controls the intensity of the darkest elements.
Saturation adjusts the intensity of all colours in your photo, Vibrance selectively enhances the muted colours, and Warmth adjusts the colour temperature.
Tint helps fine-tune the colour balance, which is particularly useful for eliminating unwanted colour casts. Sharpness brings clarity and definition to your photo, making it appear crisper and more focused. Noise reduction reduces ‘visual noise’ or graininess in photos, particularly those taken in low-light conditions. Definition enhances the clarity and detail of an image, making textures and edges more distinct and improving the overall sharpness of the photo.
Portrait mode is an invaluable tool for a beauty professional focusing on indoor shots of nails and detailed facial features (hopefully illuminated by a ring light!). This mode excels in creating a shallow depth of field, which beautifully blurs the background and keeps the subject in sharp focus. Additionally, portrait mode often provides better lighting options and colour saturation, enhancing the overall esthetic appeal of the images.
Video editing essentials
Editing videos is as intuitive as photos. You can trim videos, adjust exposure, apply filters, and more. With these tools at your fingertips, you have the power to turn your iPhone photos and videos into stunning pieces of art. Whether it’s a casual snapshot or a more thought-out composition, the editing tools on your iPhone can help you achieve the desired effect with ease.
For a quick workflow, start with Auto Enhance to get a baseline, then fine-tune Exposure, Highlights, Shadows, and Contrast to balance light across the frame. Increase Saturation or Vibrance to push colours in a controlled way, and use Warmth and Tint to adjust the overall mood and remove colour casts.
My iPhone 14 Pro RAW Editing Workflow using Lightroom Mobile
Portrait mode combined with proper lighting creates professional-looking nail and facial detail shots with a pleasing bokeh that emphasizes subject texture and color accuracy. When lighting isn’t ideal, rely on the built-in editing tools to recover details in either bright or dark regions and to enhance texture and colour fidelity.
In practice, small, deliberate adjustments often yield the most natural results. A subtle tweak to Exposure and Highlights can recover detail without making an image look over-processed. A gentle boost in Saturation and Warmth can make skin tones appear healthier and more vibrant.
With these techniques, you can produce compelling photo and video edits directly on your iPhone, turning everyday captures into polished, share-worthy content.
Practical tips for best results
- Prefer natural light when possible and position the subject to face the light source.
- Use Portrait mode indoors with a ring light to sharpen details while softly blurring the background.
- Engage Auto Enhance first, then apply manual tweaks to Exposure, Highlights, and Shadows for balance.
- Restore detail in blown-out areas with Highlights and recover depth in shadows for a fuller tonal range.
- Adjust Colour with Saturation, Vibrance, and Warmth to achieve lifelike tones, avoiding over-saturation.