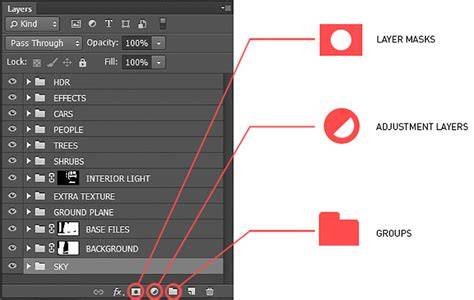
As you add layers or layer groups to an image, it’s helpful to give them names that reflect their content. Double-click the layer name or group name in the Layers panel and enter a new name. Click the Delete icon or Delete Group from the Layers panel menu. Delete > Hidden Layers.
Color coding layers and groups helps you locate related layers in the Layers panel. You cannot use the painting tools or filters on layers that contain vector data (such as type layers, shape layers, vector masks, or Smart Objects) and generated data (such as fill layers). Once your layer is rasterized, you cannot edit them earlier because they are now converted to pixel-based layers. It’s recommended to duplicate your layer and apply rasterization so that you can always go back to the original if necessary. Rasterizes the type on a type layer.
As of July 2024, Photoshop’s legacy 3D features have been removed. When you have finalized the content of layers, you can merge them to reduce the size of your image files. When you merge layers, the data on the top layers replaces any data it overlaps on the lower layers.
Merge Down and Merge Visible
Merge down: To merge two adjacent visible layers where the bottom layer is a pixel layer, select the top layer in the Layers panel and then choose Layer > Merge Down, or choose Merge Down from the Layers panel’s menu, or press Cmd+E (macOS)/ Ctrl+E (Windows).
Merge visible: To simply merge a selected few layers in your document, you can hide the layers you don’t want to combine and select a pixel layer as your base. Select the base layer in the clipping mask.
In addition to merging layers, you can also stamp them. You can prefer to use stamping when you want to edit multiple layers with the same tools but only one layer at a time.
Stamp visible: You can disable the layers that you do not wish to stamp by turning off their visibility in the Layers panel and then pressing Shift+Opt+Cmd+E (macOS)/ Shift+Alt+Ctrl+E (Windows).
Flattening and Layer Effects
Flattening reduces file size by merging all visible layers into the background and discarding hidden layers. Any transparent areas that remain are filled with white.
Flatten All Layer Effects: To flatten only the layer styles instead of the entire image file, select File > Scripts > Flatten All Layer Effects. The image on the left shows the Layers panel (with three layers) and file size before flattening.
An image between some color modes flattens the file. If you have a question to ask or an idea to share, come and participate in the Adobe Photoshop community.
Understanding Layers as Building Blocks
Layers in Photoshop are like transparent sheets of paper that lie on top of one another and allow you to make precise edits to certain areas of your image one at a time. Merging layers is when you combine two or more separate layers into a single layer. When this happens, the data on the top layer replaces any data it overlaps with on the lower layers.
- The easiest way to merge layers is to click on one layer, hold Shift, and click on another.
- To use the Merge Layers tool, simply select one layer and then another using the method above.
- You can merge layers with a Clipping Mask, which defines the shape and boundaries of a group of layers.
- First, hide any layers that you don’t want to merge. Then select the base layer in the Clipping Mask.
- As you work, you toggle the eye icon on and off to make certain layers appear and disappear from your project.
To merge all visible layers, use the eye icon to ensure all your desired layers are visible. When you flatten layers in Photoshop, you merge several visible layers into a single background layer. Keep in mind that merging layers is what’s known as a “destructive” editing method. You can’t go back and change it when you’re done.
Layers can contain immense amounts of data. The Camera Raw filter works on only one layer at a time. Stay organized by naming your layers and adhering to a consistent naming scheme. Certain tools can work only on non-vector or rasterized layers. If an individual layer or group of layers won’t merge, try rasterizing the layers first so they are compatible. Once you have merged layers, they are merged permanently.
Image: Maria Diaz / ZDNet
Since Photoshop works predominantly with layers, learning how to merge layers is useful when you need to make one layer out of several. This can be helpful when you have many image layers and Photoshop is either crashing or running slowly or you want to copy and paste an image quickly, without having to save it in a picture format beforehand.
Practical How-To: Merging Layers
How to merge layers in Photoshop
- Select layers to merge. We’ll merge these and they’ll work as one single layer.
- Merge layers by pressing Ctrl+E (Cmd+E for Mac) or right-click (Control+click for Mac) on the selected layers and click Merge Layers. The layers are merged into one.
- To merge all the layers in your Photoshop document, select all the layers and right-click (Control+click for Mac) on the layers panel and select Merge Layers or, without needing to select them, use the shortcut Shift+Ctrl+E (Shift+Cmd+E for Mac).
Photoshop also has the option to merge visible layers. This will combine just the layers that are visible in the moment and leave others that have the visibility off, separated. Merging layers reduces the number of layers, but stamping often adds a new layer. As you can see, whether you’re merging layers or stamping layers, there are all kinds of shortcuts.
Layer merging is a basic yet essential skill in Photoshop. It might seem simple, but it's a key part of managing your layers. You can only merge layers that are visible. If a layer is visible, you’ll see an eyeball icon to the left of its name. You can also merge sets of grouped layers. This creates a brand new layer containing the contents of the selected layers. The original layers have not been merged, so you can still edit them separately.
If a layer is visible, you’ll see an eyeball icon to the left of its name. You can also merge sets of grouped layers. This creates a brand new layer containing the contents of the selected layers. The original layers have not been merged, so you can still edit them separately. If there’s an empty box instead of an eyeball next to the layer name, that means the layer is hidden.
Linked layers stay discrete, meaning you could edit them separately if you wanted. However, every time you click on one linked layer, you automatically adjust the layer(s) it is linked to as well. If you’ve got a series of layers that all make up the same image, such as a shading, sketching, and inking layer for a small animated character, you can group them together, allowing you to see and work on just these layers in the larger image. Right-click and select Group from Layers. This is only an issue, on occasion, with merging.
5. Select Flatten Image to merge all layers together.
“You’re pretty good with this stuff!” In Photoshop, layers are the building blocks of any project. As your design grows, you might end up with many layers on your canvas. Too many layers can make things confusing and increase your file size. In Photoshop, every layer is like a clear sheet you can edit independently. Once you finish editing a part of your work, you can merge several layers into one. When you merge layers, the top layer covers the area of the layer beneath it. Remember, merging layers is a one-way process. After you save, you can't get the original layers back.
Photoshop offers several ways to merge layers. This method merges the selected layer with the one right below it. First, click the top layer you want to merge. Alternatively, to select a group of consecutive layers, click the first layer, hold down Shift, and then click the last layer. This command combines all the layers in Photoshop into one single layer. Keep in mind that after flattening, you cannot edit the layers separately. Stamp Visible is a unique way to merge layers without changing the original ones. Select a layer and press Ctrl+Alt+E (Cmd+Option+E on macOS). Press Shift+Ctrl+Alt+E (Shift+Cmd+Option+E on macOS) to stamp all the layers you can see into one new layer. Select a layer group and press Ctrl+Alt+E (Cmd+Option+E on macOS). Merging layers reduces the number of layers, but stamping often adds a new layer.
As you can see, whether you're merging layers or stamping layers, there are all kinds of shortcuts. We recommend exploring a TourBox creative console for efficiency. Layer merging is a basic yet essential skill in Photoshop. It might seem simple, but it's a key part of managing your layers. Need to merge layers in Photoshop? Don’t flatten the image and lose all your work. Learn how to merge a copy of your existing layers onto a separate layer!
When working with multi-layered Photoshop documents, you often reach a point where you need to flatten the image. Usually it's so you can sharpen the image for print or for uploading to the web. But while Photoshop does have a Flatten Image command, it's not the solution you're looking for. When you flatten the image, you lose all of your layers. So in this tutorial, you'll learn a better way: merge your layers onto a separate layer and keep your existing layers intact. But there's a trick: you won't find a “Merge All Layers To A New Layer” command anywhere in Photoshop. Instead, you need to know a secret keyboard shortcut.
Before we learn how to merge layers onto a new layer, let's take a quick look at why flattening an image is a bad idea. In the Layers panel, we see that I've added several layers to my document. Along with the original image on the Background layer, I also have a separate layer for smoothing skin. Above that is a layer for whitening teeth. But first, I would want to sharpen the image. One way to merge layers in Photoshop is to simply flatten the image. But here's the problem: By flattening the image, I've lost all of my layers. Here's a better way to work. Whenever we add a new layer, Photoshop places it directly above the currently-selected layer. On a Windows PC, press Shift+Ctrl+Alt+E. On a Mac, press Shift+Command+Option+E. And if we look again in my Layers panel, we now see a brand new layer above the original layers. At this point, it's a good idea to give the merged layer a more descriptive name. And there we have it! Check out our Photoshop Basics section for more tutorials!