DaVinci Resolve is a powerful, versatile video editing platform that balances advanced color correction, editing tools, and audio post-production in one place. This guide stitches together practical steps and concepts from a dense draft to deliver a cohesive, detailed overview of basic editing tools, audio mixing, color grading, transitions, text, and exports in the free version of Resolve.
Getting started and the workspace
Start by launching DaVinci Resolve. If you’ve never used it before, the Projects window will look a little bare, so click on ‘New Project’, lower right of the interface. Resolve is divided into seven different Pages (workspaces) designed to focus on specific jobs: Media, Cut, Edit, Fusion, Color, Fairlight, and Deliver. Media Page opens by default and lets you import footage and organize bins and timelines with ease. Cut Page provides simple tools for quick edits, while Edit Page is the main workspace with access to transitions, effects, and the Inspector. Fusion Page hosts advanced visual effects with node-based compositing, Color Page offers extensive color grading tools, Fairlight Page specializes in audio, and Deliver Page handles exporting. An important note is that you can import media from any page-go to File > Import > Media to bring clips into the Media Pool.
Importing media and organizing projects
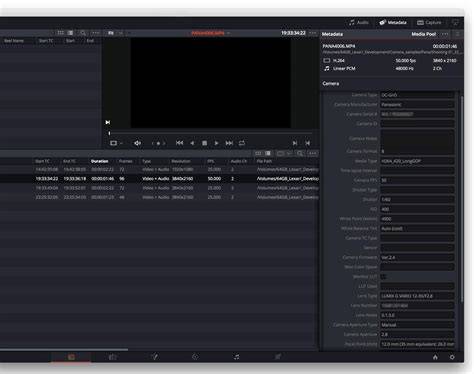
Import media via File > Import > Media or by pressing ⌘I (Mac) / CTRL I (Windows). You can also drag and drop footage from Finder or Explorer directly into the Media Pool. When you click a clip, you can view metadata or switch to different views such as Thumbnail, Strip, or List. Resolve uses a disk database for project management, and new projects can be created from the Project Manager or File > New Project. You’ll set basic project settings, including timeline frame rate and resolution, to match your footage. You can mark in and out points with I and O to select specific portions for your timeline, which is handy for assembling your cuts efficiently.
Cut and Edit pages: assembling and refining your timeline
The Cut Page offers a streamlined workflow for assembling rough cuts, while the Edit Page provides a more granular environment with two viewers: Source and Timeline. In Edit, the Inspector (top right) gives access to per-clip adjustments, including position, scale, rotation, and other effects. You can drag clips onto the timeline, and clips snap together to avoid gaps. To insert a clip between existing ones, select it and press F9 (Insert) or click the Insert icon above the timeline. Overwriting is the default when dropping a clip on an existing one, unless you choose Insert.
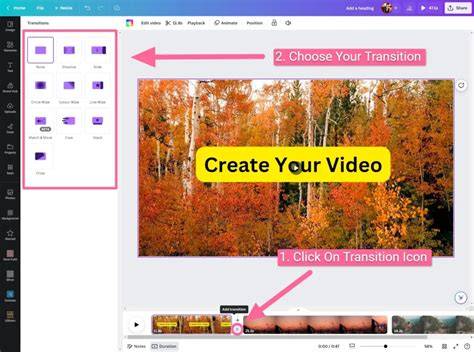
Transitions and effects live in the lower-right of the Edit Page. Drag transitions between clips to apply them. Resolve previews transitions near the playhead as you hover over them, which makes choosing a suitable transition fast and intuitive. Keyframes in the Inspector allow you to animate properties such as scale, position, and opacity over time. Each keyframe is represented by a diamond in the inspector; red rhombuses indicate active animation points.
Text, titles, and typography
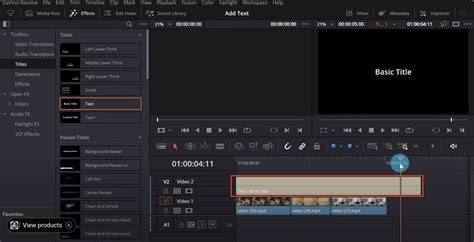
Text tools are accessible from the Effects Library (top-left). To add text, select Title and choose Text for simple 2D titles or Text+ for more advanced, Fusion-based titles. Drag the text onto the timeline above the video track. Edit the font, size, color, and position in the Video tab (top-right). Text+ offers more complex animation and effects but may require longer rendering times. When using titles, ensure you select the title in the timeline before modifying it, as this affects the correct clip in the inspector.
Color grading and correction
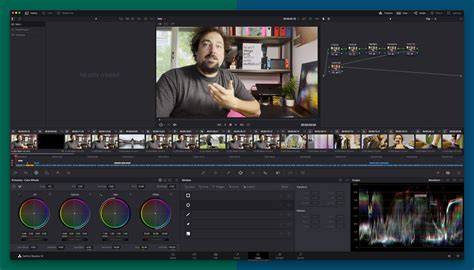
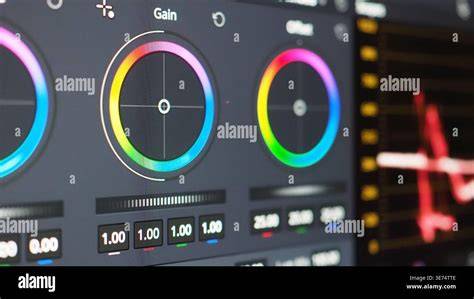
The Color Page hosts Resolve’s renowned color tools. Before grading, open Project Settings (gear icon) and adjust Color Management and color space settings as needed. Resolve uses a Node Editor for color workflows, allowing you to connect different color effects and corrections in a flexible, web-like graph. Creating a new node is as simple as right-clicking in the node editor and choosing Add Node. The bottom panels include a suite of color tools: Camera Raw, Color Wheels, Curves, HDR Grade, RGB Mixer, and more. Curves provide precise control over contrast; an S-curve can lift highlights and deepen shadows. Primary Wheels (Gain, Lift, Gamma, and Offset) allow intuitive tonal adjustments and color balancing.
Scopes in the lower-right help you measure exposure and color accuracy, essential for ensuring consistent results across shots. The Sat control adjusts saturation, while white balance and black balance adjustments help set neutral reference points for your image. The Color Page also introduces advanced tools like Magic Mask for object selection and tracking, which can be leveraged for selective color corrections and effects. As you gain confidence, you can explore HDR grading and color warper features for more nuanced looks.
Audio: mixing and Fairlight
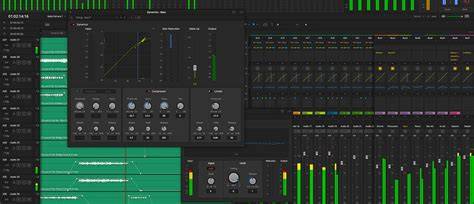
The Fairlight Page is DaVinci Resolve’s dedicated audio workspace. It provides professional-level tools for mixing, effects, and automation. You can import audio the same way as video, and use the Fairlight tab to apply effects, adjust levels, and route audio through buses. The modern workflow supports multi-track mixing, dynamic range control, and flexible automation to shape the soundtrack in parallel with picture editing.
Effects, OpenFX, and plugins
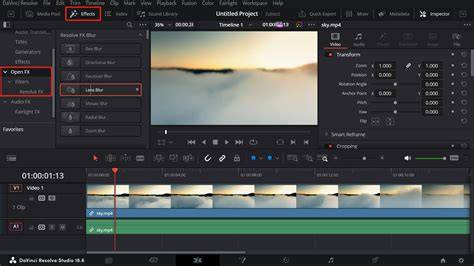
Resolve ships with a robust Effects Library. Transitions, OpenFX effects, and motion graphics templates can be dragged onto clips in the timeline. The Effects Library also includes OpenFX categories such as Vignette and Adjustment Clip, which affects the entire timeline or selected regions. Some advanced effects, like Surface Tracker and updated depth-based tools, may be restricted to the paid Studio version, but the free version still provides a rich set of options for most projects. You can preview transitions by hovering over them and apply by dragging between clips. For global effects, you can apply an Adjustment Clip to affect the whole timeline.
Export and delivery
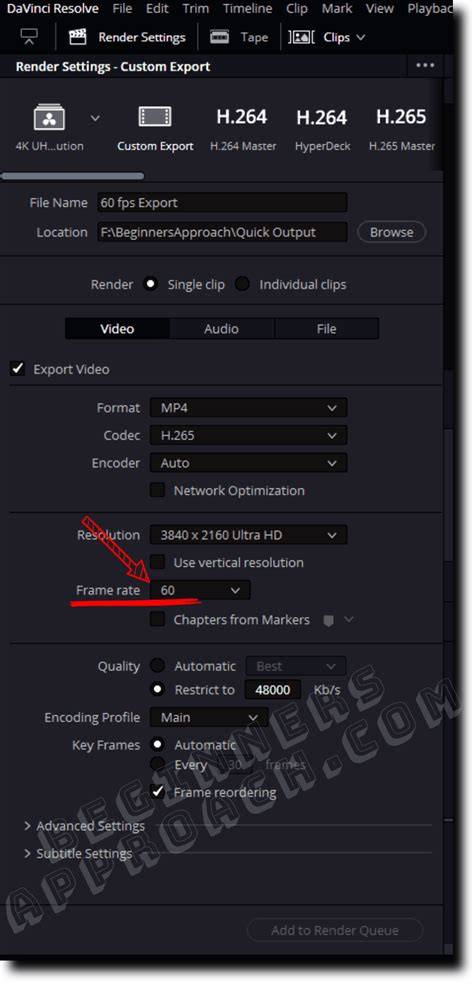
When you’re ready to export, switch to the Deliver Page (rocket icon). Check project settings to ensure the frame rate and resolution match your delivery targets. The left sidebar lists presets; you can export as MP4 or QuickTime, and you can adjust encoding settings as needed. Add to Render Queue and click Render All to produce your final video. Resolve’s export options are extensive and support direct sharing to various platforms, with ongoing updates improving supported formats and workflows.
Workflow tips and best practices
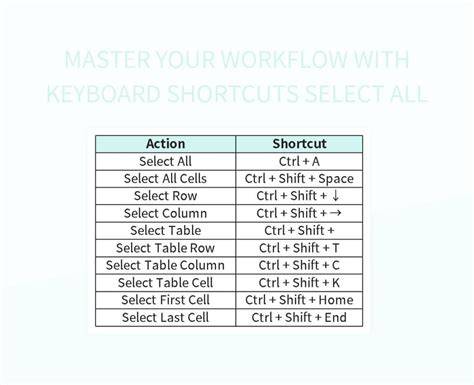
Begin with a clear project plan and an organized Media Pool. Use bins to separate footage, audio, and graphics. Utilize keyword tagging and metadata to speed up your search for clips. Learn and use keyboard shortcuts to accelerate editing: common ones include A (Selection), T (Trim), B (Blade), and command/CTRL shortcuts for media management. The Node-based color workflow, flexible Inspector controls, and structured Pages all contribute to a highly efficient editing experience once you become familiar with the layout. For multicam projects, Resolve 18 introduces improved syncing and proxy handling to streamline collaboration.
Summary of core capabilities
- Intuitive basic editing tools and a modular, page-based workflow
- Advanced color correction and grading via the Color Page with node-based editing
- Dedicated Fairlight audio tooling for mixing and effects
- Extensive transitions, OpenFX, and text/title options
- Robust export and delivery options with presets and custom settings
- Free version offers substantial power, with Studio as a paid upgrade