This guide explains the process from setting up avatar data created or edited in Blender in Unity to uploading it to VRChat. While this is written for avatar modification, the overall flow is the same for new avatars, so you can use it as a reference. If you have followed this article but are having trouble, please feel free to contact me directly. I will provide as much support as I can.
Preparation in Blender
First, before exporting from Blender, check things like the scale. Check the properties of the objects you want to export (mesh, Armature) to ensure there are no unnecessary values in the scale or location. Make sure the Location is 0 and the Scale is 1.000. If there are values here, it can cause various problems in Unity. In that case, use Ctrl+A to Apply Transform and fix it. Be especially careful if a scale value is present, as it can cause various issues such as shader outlines becoming extremely thin or thick. Note that, as I will explain later, a Rotation X of 90 is fine.
Also check the origin of the object. The origin is the orange dot displayed when you select an object such as a mesh. It serves as the reference point for operations like rotation.
Object Origin
Ensure the origin is at the center of the coordinate system. If the origin position is incorrect, use Shift+C to return the 3D cursor to the origin of the coordinate system, then change it via Object > Set Origin > Origin to 3D Cursor.
Origin to 3D Cursor
While this is fine for the avatar and its clothing, small items that are not skinned are often better off not being at the world origin, so please handle them accordingly.
Reference: Supplement: Correcting Rotation
You probably won't have major issues if you skip this step, but unexpected things will happen in Unity. That is this Rotation X: -89.98. Rotation X: -89.98
Because Unity and Blender have different coordinate systems, a value is entered into the X-axis rotation. This value is actually -90°, but due to the relationship between Unity's internal calculations and significant figures, it appears as 89.98. You can proceed to upload in this state without any problems, but it feels a bit off, and I don't want to deal with unnecessary trouble, so I will fix it.
The way to fix it is simple: if X should be -90°, you can just rotate it 90° in the X-axis direction from the start. First, select the mesh object and then the Armature, and use Alt+P to select Clear Parent: Clear and Keep Transform. Clear Parent
Once the parent is cleared, select all objects and in Object Mode, press R→X→-90. Don't forget to select the Armature with the orange icon as well. This rotates it by -90°. Rotate -90° in X direction
While still selected, use Ctrl+A to Apply the Rotation. Apply Rotation
Now you have a model rotated by -90°. Finally, select the objects again and press R→X→90. This completes the model rotated 90° in the X direction. Don’t forget to set the parent with the Armature again using Ctrl+P. Just to be safe, check that the Armature Modifier settings for each mesh are correct. The finished form should look like this. Rotation X became 90
It is fine if only Rotation X is 90 and the others are 0. By the way, as an aside, this setting is required for Unity 2019, but it seems that newer Unity versions can automatically convert it during import.
If there are no issues, proceed to export.
Blender Output Settings
First, the fbx file output settings. In Blender, select File > Export > FBX (.fbx). Export > FBX When the window opens, select the items to include in the output. From Include > Object Types, select only Armature, Mesh.
Next, set the coordinate system. Change Transform > Apply Settings from All local to FBX All. If the scaling remains Local here, it will become 100 or similar in Unity. If you try to force the settings as they are, all setting values such as outline thickness and PhysBone Radius will be off by two decimal places. This is a common mistake, so be careful (sometimes this happens even with sold data...).
Apply Settings: FBX All
If you scroll down, there is a setting called Add Leaf Bones inside Armature. Whether or not to check this depends on the situation, but in most cases, I think it is fine to leave it off.
Add Leaf Bones
What you should be careful about is the original avatar, or if you are opening the .blend file directly. If a bone named "XX_End" is included in the Armature in Unity, a leaf bone is attached. If there is a leaf bone in Unity but no leaf bone in Blender where the leaf bone should be, please add a leaf bone. If you are creating a new avatar, read the supplementary notes below and select as necessary.
Supplementary note: About leaf bones
What is a leaf bone? It is a bone added to the tip of a terminal bone (it will have a name like XX_End). In Unity, bones are represented as GameObjects, so terminal bones do not have length information. (More accurately, the concept of "length" of a bone itself does not exist, and if length is required, the position of the bone's child bone is treated as the tip of the bone.) Therefore, when setting up PhysBone, you need to set the Endpoint position or add a child bone to give the terminal bone length. A leaf bone is what automatically generates this child bone at the tip of the terminal bone.
Also, if you want to apply PhysBone to a single bone that does not have a child bone, even if you set the Endpoint Position, the PhysBone may extend in an unintended direction. In such cases, it is better to add a leaf bone. Of course, it is the same thing if you manually grow a child bone at the tip of the bone without adding a leaf bone.
Once the above settings are finished, press Export FBX to output the fbx file. It is also convenient to save the settings at this time as a preset. Add preset
Supplementary note: About the output destination
It is convenient to output directly into the Unity project (Assets folder). By utilizing Prefab Variants, you can also overwrite and modify the fbx. Please refer to this article for details.
Importing to Unity
Once you have successfully output the fbx file, import it into Unity. Import the fbx file into the project by dragging and dropping it from Explorer. When you select the imported fbx (cardboard box icon), the fbx file import settings will be displayed in the inspector, so please set them as follows.
Model tab
Turn off Import Cameras and Import Lights (if you unchecked Camera and Light when outputting from Blender, it is fine to leave these checked). Read/Write Enabled If you forget to check this, an error will occur where the polygon count becomes enormous during upload. Set Blender Shape Normals to None. If you do not do this, the avatar will become very heavy. However, depending on how you use shape keys, it might be necessary. Please refer to the following article for details.
Once you have configured the settings above, click Apply.
Rig Tab
Change the Animation Type to Humanoid. Click Apply, then click Configure... At this point, if the currently open scene is not saved, you will be asked whether to save it. If a pop-up appears, click Save to save the scene. The scene has been changed.
On this screen, you will check if each bone matches the Humanoid Rig. In most cases, it should be set up correctly automatically. However, the Jaw bone within the Head section is often incorrectly assigned to bangs or other bones, so be sure to check it. If an incorrect bone is assigned, delete it and set the Jaw to None. The jaw bone is used when performing lip-syncing with bones, so it is generally not used. (Usually, lip-syncing is done using shape keys.) Set Jaw to None
Once you have confirmed that all bones are correct, scroll to the bottom of the screen and click Apply, then click Done. Apply then Done
Note that if an error occurs here, the parts corresponding to the missing bones will be displayed in red as shown below. By the way, the image below is an fbx file that does not include an Armature, so everything is bright red.
When bones are not found Animation Tab No settings are required. Animation Tab
Materials Tab No settings are required here either. However, only if you need materials, click Extract Materials... to extract them. If you are putting unsupported clothing on an existing avatar, the clothing data (unitypackage) should already contain the materials, so there is no need to extract them.
Materials Tab
Preset
Once you have finished the settings, you can save the import settings from the icon in the upper right. A Select Preset window will appear, so click Save Current to... Save Preset A window will appear asking where to save it. From here, we will configure the mesh (Skinned Mesh Renderer).
Material settings
In the case of modifications, there should be Materials included with the original avatar data or clothing data, so apply those to each mesh. Since it can sometimes be difficult to judge from the names, it is a good idea to place the pre-modification avatar or clothing data in the Hierarchy and compare them while setting the same materials. Material settings
※When uploading a Quest-compatible avatar At this time, when configuring for Quest, the available shaders are limited, so you need to change the shader applied to the material. Shaders like liltoon, UTS2, or poiyomi shader, which are widely used for PC, cannot be used. When making it Quest-compatible, it is generally best to use VRChat/Mobile/ToonLit. However, since this shader does not support transparency, expressions like blushing may break. In that case, you will need to take measures such as changing the animation for the blushing expression. Please look up the details yourself (I'm leaving this to you).
Reference: For those who understand, it is also possible to achieve rich expressions using MatCap or NormalMap by using the Standard shader instead of ToonLit even for Quest avatars. Please refer to the following link for details.
Bounds settings
Bounds are the areas used to determine whether to render a mesh. The white frame shown in the image below is the Bounds. When you bring in an fbx file from Blender, the Bounds for each mesh are automatically determined by the size of the mesh. However, this causes the Bounds for small objects like underwear, accessories, and shoes to become small, which can lead to the mesh disappearing when it is at the edge of your field of view. Therefore, it is recommended to unify the Bounds of all meshes to the same size and position.
If they are Skinned Meshes, as long as they have the same Root Bone and the same scale, you can simply select multiple of them and enter the same values. Bounds and Anchor Override settings
Anchor Override settings
When you go to a dark world in VRChat, sometimes only the face becomes dark, or the brightness between meshes does not become uniform. One of the causes for this is the Anchor Override setting (sometimes it is caused by different material or shader settings). When light hits a mesh, the light hitting the center of the Bounds is usually calculated, but this causes the body, clothes, and other parts to be rendered with different brightness. By setting the Anchor Override, you can specify the coordinates used for brightness calculation. There is no absolute correct answer for where to specify, but it seems best to specify the Chest bone. Please specify the same object for all meshes.
Settings for VRChat
From here on, these are the settings for VRChat. We will transfer the settings from the original, pre-setup avatar data. What you need are the VRChat Avatar Descriptor, PhysBone, and Cloth (if you are using it). If there are any other components set up in Unity, transfer those as well.
As for how to do this, I will first introduce the method of copying using standard Unity functions. After that, I will introduce a convenient extension tool that allows for batch copying.
VRC Avatar Descriptor and Physical Components
First is the Avatar Descriptor. This is a mandatory component for uploading as a VRChat avatar. Select the original avatar object, right-click on the name part of the VRC Avatar Descriptor in the Inspector, and select Copy Component. Once copied, right-click on the title part of the Transform or Animator in the Inspector of the modified avatar data, and select Paste Component As New. Copy Component
Paste Component As New
With this, the Avatar Descriptor has been pasted in its entirety. However, since the references to meshes and bones inside the Avatar Descriptor remain those of the old avatar, you need to re-specify them to the meshes and bones of the new avatar. Specifically, these are the red parts in the image below. VRC Avatar Descriptor
When uploading as the same avatar after modification, don't forget to attach the Blueprint ID to the Pipeline Manager. The Pipeline Manager is a component that is automatically added when you attach an Avatar Descriptor. The Blueprint ID is an ID used to distinguish avatars. If you want to overwrite an already uploaded avatar, you need to set the same Blueprint ID. If you select Content Manager from the VRChat SDK window, a list of uploaded avatars will be displayed, and you can copy the Blueprint ID by pressing Copy ID.
Phys Bone If there are moving parts, PhysBone settings are also required. Open the Armature of the original avatar, check which bones have the VRC Phys Bone Component attached, and set them to the same bones.
Finding PhysBone Here, PhysBone was attached to the Ear, Hair, and Tail. As usual, Copy Component the setting values and Paste Component As New. If bones are specified in the Root Transform, etc., manually re-specify only those to the new avatar's bones. Note that if the object with the VRC Phys Bone Component attached and the Root Transform are the same, there is no problem even if the Root Transform is left blank. Root Transform, Colliders reference
The same applies to Phys Bone Collider. Here, if the collider is attached to a GameObject that is not a bone, you need to copy that entire GameObject to the new avatar side. In that case, unpack the original avatar Prefab (you do not need to unpack the copy destination!), and move the object with the collider to the same hierarchy. You can find the collider in the Hierarchy by clicking on the object referenced in the Colliders within the Phys Bone Component. Object for collider
Doing all of this manually is quite a hassle, isn’t it?
Convenient Tools
I have introduced the manual method so far, but since it is clearly troublesome, I will introduce a convenient Unity editor extension called CopyComponentByRegex. This is a tool that automatically copies components whose names match a regular expression from the copy source hierarchy to the copy destination. Moreover, it automatically searches for and corrects references within each component from the new hierarchy. This means you don't have to manually redo the face mesh specification for the Avatar Descriptor or the collider specification for PhysBone mentioned earlier! Wonderful. Please refer to the link for installation instructions.
Once installed, if you right-click on a GameObject in the Hierarchy, you will see the extension options to simplify copying across avatars for VRChat models.
VRChat-Specific Considerations
VRChat models must meet polygon, bone, shader, and platform performance limits. The Avatar Performance Rating system ranks avatars as Excellent, Good, Medium, Poor, or Very Poor. VRChat recommends aiming for Good; Medium is usually acceptable if Good is not realistic. A key point: VRChat measures triangles, not polygons. The official PC Excellent limit is 32,000 triangles. The 70,000 triangles / 150 bones target belongs to the PC Good tier.
| Platform | Triangles (Max) | Bones | Material Slots | PhysBones |
|---|---|---|---|---|
| PC Excellent | 32,000 | 75 | 48 | 4 |
| PC Good | 70,000 | 150 | 68 | 6 |
| Mobile/Quest Excellent | 7,500 | 25 | 10 | 2 |
| Mobile/Quest Good | 10,000 | 50 | 18 | 4 |
If an avatar exceeds the Poor threshold, it becomes Very Poor. This is why some downloaded VRChat models may appear as fallback avatars, lose components, or fail to display for other users. Mobile limits are stricter, so Poor or Very Poor mobile avatars are more likely to be blocked or partially removed.
Video and Image Aids
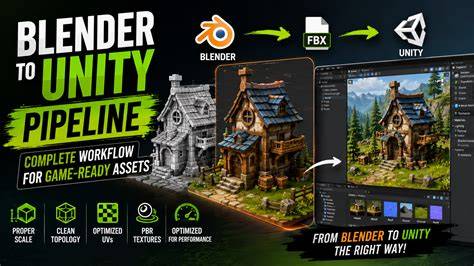
Infographics and workflow diagrams can help visualize the Blender to Unity to VRChat upload flow. Look for a step-by-step visual guide illustrating rotation fixes, leaf bones, and VRChat Avatar Descriptor setup.
How to Upload Avatar in VRChat using Blender & Unity | 2025 Tutorial
VRChat Avatar Upload Workflow
In summary, the typical path is: model preparation in Blender with correct transforms, export FBX with appropriate settings, import into Unity and configure Humanoid rig, ensure Bones and Jaw assignments are correct, adjust Materials and Bounds and Anchor Overrides, then transfer or recreate the VRChat Avatar Descriptor and PhysBone components, and finally build and publish via VRChat SDK. Extensions like CopyComponentByRegex can speed up the process by automating repetitive copy tasks.
The preferred VRChat avatar format remains FBX because Unity imports meshes, skeletons, materials, and animations reliably. VRChat’s avatar workflow also requires configuring the rig in Unity before upload. VRM or PMX models require conversion and cleanup, while Blender remains a free, powerful tool for editing and rigging. Shaders such as lilToon or Poiyomi Toon Shader are common, but for Quest compatibility you may need to adjust to VRChat/Mobile/ToonLit and related constraints.
For AI-generated starting points, tools like Tripo AI can create textured starting meshes. Treat these as starting points rather than ready-to-upload avatars; you still need to rig, optimize, configure, and test in Unity before upload.
In the end, whether you start from a free model or a fully customized base, the key is testing and iteration within Unity and VRChat’s performance budgets to ensure a smooth, shareable experience.