Animation brush work in Clip Studio Paint combines traditional drawing sensibilities with digital tooling to create smooth, expressive motion. By leveraging brush settings, keyframe-based timelines, and raster/vector capabilities, artists can craft appealing animated sequences that enhance storytelling and character action.
Understanding the Animation Workflow in Clip Studio Paint
Clip Studio Paint offers a timeline and frame-based workflow that supports animation projects from simple animated GIFs to more complex scene sequences. The animation brush approach centers on consistent stroke quality and deliberate timing to convey motion. To begin, set up a new animation document and enable the timeline, then choose brushes that best preserve line weight and texture across frames.
Key considerations include consistent line weight, ease of motion, and the balance between frame count and file size. As you draw, reuse core shapes and silhouettes to maintain readability across frames, adjusting timing to emphasize key movement points. Transitions between frames should avoid abrupt shifts in gesture unless intentional for the scene.
Choosing Brushes for Animation
Brush selection impacts the expressiveness of movement. In Clip Studio Paint, you can configure brushes to retain a clean silhouette on each frame or to simulate natural inking textures that respond to motion. Use brushes that maintain stable edges when inking across frames, and consider textures sparingly to avoid distracting flickers during playback.
For line quality, prefer brushes with controllable pressure sensitivity and consistent smoothing. In dynamic scenes, a combination of a main inking brush and a secondary texture brush can yield depth without overwhelming the composition. Adjust brush stability, minimum size, and opacity jitter to achieve the desired look for hold frames and in-between frames.
Setting Up the Timeline and Keyframes
Timeline setup is essential for timing and pacing. Create keyframes at crucial moments-pose transitions, emphasis beats, and expressive actions. Between keyframes, use in-between frames to interpolate motion, ensuring fluidity without sacrificing the clarity of gesture. Clip Studio Paint provides onion skinning to visualize previous and upcoming frames, aiding consistency across motion.
When animating brush strokes, keep stroke direction coherent with motion. For example, trailing strokes in fast actions should feel elongated in the direction of movement, while slower actions require softer, subtler lines. Use a combination of frame duplication and precise painting to refine in-betweens for smoother motion curves.
Practical Tips for Cleaner Animations
To achieve crisp animation results, reduce inconsistent line weights by stabilizing brush settings and relying on on-curve smoothing. Maintain a readable silhouette by avoiding excessive line detail in fast sequences. Layer management matters: separate line work, color fills, and effects into layers or layer groups to facilitate adjustments without reworking every frame.
Leverage clipping masks and selection tools to protect important outlines while painting in-between frames. Use frame-by-frame painting for key moments and rely on interpolation for gradual changes, such as shading evolution or subtle pose shifts. Regularly playback the sequence to identify jitter, wobble, or timing issues early in the process.
Color, Shading, and Effects in Animation
Color consistency across frames can be maintained by using indexed color or palettes and locking color layers where appropriate. When shading, apply consistent light direction and edge highlights to reinforce three-dimensional form during motion. Effects like glow, motion blur, or particle particles should be introduced with restraint to avoid overpowering the line work.
Motion blur in Clip Studio Paint can be simulated by duplicating frames and slightly offsetting the stroke direction, or by using blur tools selectively on specific layers. For complex scenes, separate animation of characters and backgrounds helps preserve readability and reduce unnecessary redraws.
Exporting and Sharing Animated Projects
Export options include animated GIFs and video formats. Prioritize frame rate settings that balance smoothness with file size. When exporting, ensure any audio tracks are synchronized with the animation timeline if included. Optimizing resolution and compression settings will help preserve detail in the brush strokes while keeping final file sizes manageable for sharing.
For collaborative workflows, organize project files with clearly named layers, frames, and assets. Maintain a clean archive of renders and source sketches to streamline revisions and future animations. Sharing progress through previews or WIPs can help gather feedback without exposing unfinished work to a broad audience.
Common Pitfalls and How to Avoid Them
One frequent issue is inconsistent line weight across frames, which can distract from motion. Regularly check brush settings and apply stabilization judiciously to keep lines coherent. Another pitfall is overcomplicating frames with excessive detail; simplify where possible and reserve detailed inking for key poses.
Over-reliance on effects can compromise clarity. Use visual effects sparingly and ensure they serve the motion narrative rather than masking rough animation. Finally, poor onion skinning or misaligned keyframes can lead to noticeable jumps; adjust onion skinning ranges and verify frame alignment during playback checks.
Table: Suggested Settings for Animation Brush Tasks
The following table summarizes practical settings commonly used for animation tasks in Clip Studio Paint. Adjust values to fit your style and the needs of the scene.
| Task | Brush Type | Smoothing | Stabilization | Opacity |
|---|---|---|---|---|
| Inking outlines | Pen/Ink Brush | Low to Medium | Medium | 100% |
| Shading in frames | Soft Brush | Medium | Low | 70-90% |
| Texture accents | Texture Brush | Low | Low | 60-80% |
| Motion lines | Line Art Brush | High | Medium | 90-100% |
Дополнительные инструменты и подходы
Для повышения информативности проекта можно комбинировать кадры с простыми фонами или сценами. При необходимости добавляйте инфографику или схемы, чтобы пояснить технические моменты движения персонажа или эффектов. Эти элементы следует использовать умеренно, чтобы не перегружать восприятие и сохранить фокус на анимации.
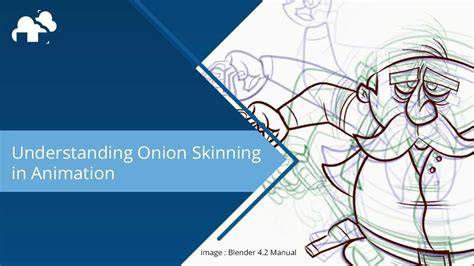
derrek's clip studio paint animation tutorial
Используйте субтитры и аннотации к кадрам, чтобы описать ключевые шаги движения и решения по стилю. Ведите журнал изменений и версий, чтобы легче отслеживать эволюцию анимации и ускорять последующие проекты.
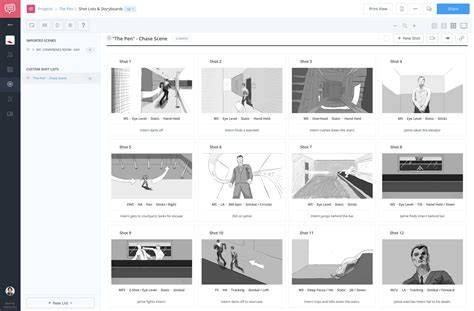
Практическая работа над проектом включает чередование ключевых поз и заполнение промежуточных кадров, что позволяет достичь гармоничного ритма и выразительности моментов. Постепенная практика с различными типами движений поможет развить уверенность в управлении линией и темпом анимации.
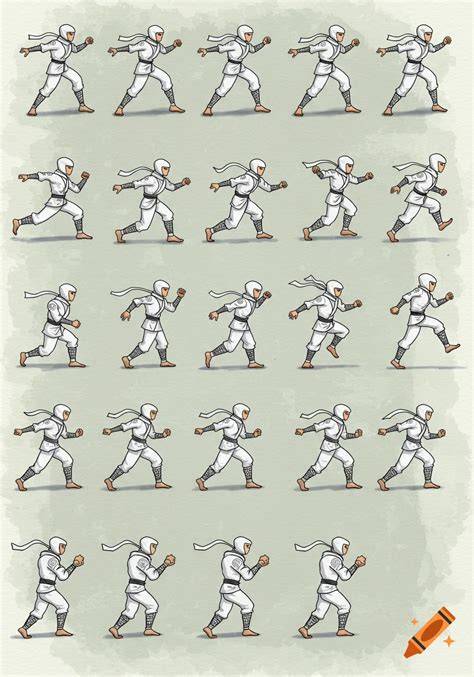
Изучение работ других художников и участие в сообществах помогает расширить арсенал приемов и подобрать новые решения для Brush Animation в Clip Studio Paint.
В итоге, грамотное сочетание выборов кистей, управление временем и аккуратное оформление слоев создают цельную и технически выверенную анимацию, которая сохраняет выразительность линии и ясность движения.