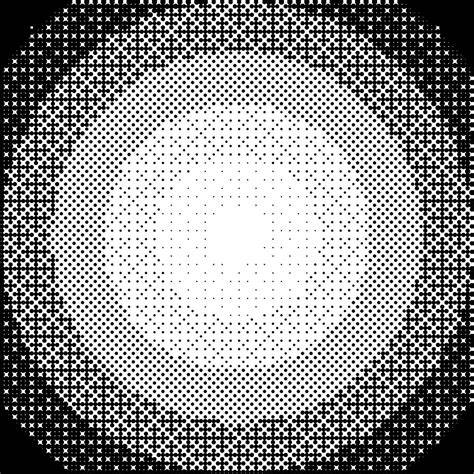
Bitmap in Photoshop refers to a specific mode that works with black and white images, distinct from the Grayscale mode. Bitmap mode is considered a "true" black-and-white mode, utilizing only black and white pixels. Understanding the difference between bitmap and vector graphics is crucial. Bitmap, or raster images, are made up of pixels which are blocks of color. When working with bitmap images in Photoshop, you can create and edit images for both print and web applications.
When working with digital images, it's essential to understand the fundamental differences between bitmap images and vector graphics. Bitmap images, also known as raster images, are made up of pixels. Vector graphics, on the other hand, are created using mathematical calculations and are not made up of pixels. The advantage of vector graphics is that they can be scaled to any size without losing their sharpness or quality. In Photoshop, we can work with both bitmap and vector graphics. However, it's essential to recognize that Photoshop is primarily a bitmap image editor.
When editing bitmap images in Photoshop, we have a wide range of tools to choose from, such as the paintbrush, eraser, and various filters. When working with vector graphics in Photoshop, we use different tools like the pen tool or the shape tools. In summary, understanding the differences between bitmap and vector graphics and their respective tools in Photoshop is crucial for creating and editing digital images effectively.
Bitmap mode in Photoshop: a true black-and-white color mode
Bitmap mode in Adobe Photoshop is a unique color mode that represents images with only two colors: black and white. This is different from other modes, such as Grayscale, which uses various shades of gray to depict the image. To use bitmap mode in Photoshop, first, open the image you want to edit. Then, go to the Image menu, select Mode, and choose Bitmap. It's important to note that any layers or masks within the image must be flattened before converting to bitmap mode.
In comparison to other color modes, bitmap mode significantly reduces the file size, as it only uses two colors. This can be useful in certain scenarios, such as designing for devices that cannot output shades of gray. Bitmap mode in Photoshop is a minimalistic option for representing images using only black and white. To create a bitmap image in Photoshop, we first need to understand that bitmap images are made up of pixels. Each pixel represents a specific color and location within an image, providing detail at a specific resolution. Import your chosen photo into Photoshop, and then convert it into grayscale mode. This is an essential step, as bitmap mode only represents "true" black and white, not the various shades of gray found in grayscale images.
Once your image is in grayscale mode, it's time to switch it to bitmap mode. Bitmap images are useful for certain applications because they ensure a sharp, crisp appearance. To change your image to bitmap mode, go to Image > Mode > Bitmap. Here, you will find several methods to create a bitmap image, such as Halftone Screen and Diffusion Dither. To edit bitmap images, you'll need to switch back to grayscale or another color mode, as Photoshop has limited editing capabilities in bitmap mode. After editing, you may convert your image back to bitmap mode when necessary.
If you need to copy parts of a bitmap image, be aware that you can only copy and paste between images of the same color mode. Finally, when working with bitmap images, keep in mind that the paths might not be as smooth compared to vector graphics. Bitmap images work well for high-detail, realistic imagery, while vector graphics are better suited for geometric shapes or illustrations with clean lines. In Photoshop, you can also convert raster files to vector graphics where appropriate.
Bitmap vs Grayscale, and practical workflow steps
There are several file formats used to store and manipulate images, including JPEG, PNG, GIF, TIFF, and EPS. Bitmap images, also known as raster images, are made up of pixels. Pixels are the smallest individual parts of a digital image and are simply blocks of color. JPEG: This format is widely used for photographs as it provides efficient compression while maintaining good image quality. PNG: PNG format supports lossless compression and preserves image quality. GIF: This format is popular for animations and supports transparency. TIFF: This versatile file format is supported by virtually all paint, image-editing, and page-layout applications. EPS: An Encapsulated PostScript file is a vector format suitable for printing, as it can be scaled without losing quality.
Bitmap mode in Photoshop is often used for hard-edged line art and removes anti-aliasing from artwork, leaving a rough, jagged edge. When converting to bitmap mode, you may choose methods like Halftone Screen or Diffusion Dither. To convert an image to Bitmap mode, follow these steps: Open the image in Photoshop, go to Image > Mode > Bitmap. Input and output resolutions should be the same. This is a common workflow for preparing print-ready, high-contrast line art that must be press-ready or device-optimized.
Photoshop remains primarily a bitmap image editor, but it supports vector workflow through the Pen Tool and Shape Tools. The in-memory BMP/DIB concepts and data structures belong to the BMP file format, which is a separate topic from Photoshop bitmap mode. For texture and print workflows, bitmap mode can be advantageous when sharp black-and-white output is required, though it sacrifices color depth and anti-aliasing.
Practical tips: printing, web use, and editor capabilities
For print purposes, resolution is critical; 300 dpi or higher is recommended for bitmap-based line art to ensure crisp output. For web usage, display size and device resolution govern how bitmap images are presented, and browsers scale bitmap images automatically. In Photoshop's Bitmap mode, images lose their anti-aliasing, resulting in hard-edged line art with jagged edges. The Bitmap color mode uses only two colors, typically black and white, producing high-contrast edges ideal for specific design needs. To convert an image to Bitmap mode, open the image, choose Image > Mode > Bitmap, and select a method such as Halftone Screen or Diffusion Dither to control the appearance of edges and halftones. After changes, you may revert to grayscale or color modes as needed, noting that editing options are limited in bitmap mode.
BMP file format basics and in-memory structure
The BMP file format stores two-dimensional digital images in various color depths, possibly with data compression, alpha channels, and color profiles. A device-independent bitmap (DIB) is a format used to define device-independent bitmaps in various color resolutions. The header and color table define how pixels map to colors, and the pixel array contains the actual image data. The simplicity of the BMP file format, and its widespread familiarity in Windows and elsewhere, makes BMP a very common format that image processing programs can read and write. While most BMP files can be large due to lack of compression, they can be compressed with lossless algorithms like ZIP in some cases. The 1bpp to 32bpp color depths describe how many colors are represented per pixel, from two colors to over 16 million colors. In practice, Photoshop workflows often focus on bitmap mode for sharp black-and-white art, while retaining the ability to move back to grayscale or color for further editing.