Clip Studio Paint offers a comprehensive toolkit for creating comics, manga, and webtoons, from panel layout and line art to color and printing considerations. The following guide compiles techniques, tips, and workflows drawn from a rich set of tutorials and expert experiences to help you build compelling manga art with Clip Studio.
Paneling and page flow: planning, frames, and gutter techniques
The panel is the border that wraps around a single moment or scene in a comic or manga. Its job is to contain an illustration that puts forth an idea, shows action, or moves the story forward in some way. Beyond its contents, the panel is a storytelling tool by itself. By containing that idea or scene, it is separating that idea from the one before and after it.
Begin with thumbnails to help visualize your story and move you through the page. Layout each panel individually, and as if they were all the same size. After that, decide your insets (a smaller, bordered panel that sits above a larger panel) and big panels from there. Which scenes should be bigger or smaller? Make sure that the panels lead the reader from left to right and down to mimic the usual reading pattern of a western-style comic book. If you are making a manga, you might go the opposite direction, from right to left. Guide your reader through your comic page by imagining page flow as a line.
There are different panel types which are all useful tools for storytelling. These are pretty standard, but can be used in multiple ways and combinations to create drama or emphasize a plot point. Also, adding various panels to an action can draw out time, show detail, or show the steps of the action that were otherwise unseen. You may also use progressions such as a “zoom in” to create excitement or tension when telling a story. The space between panels is called the gutter. If each panel is an idea, the gutter’s job is to be the space between ideas. This provides the reader time to absorb the first panel before moving on.
Removing panel borders can bleed two actions together, while overlapping panels can convey speed. If you want to draw a flashback, you can use wavy or fuzzy borders to imply recollection. Dropping out a frame can emphasize a specific object or action, especially when paired with standalone objects or silhouettes that extend to the edge of the page. Experimenting with different paneling techniques helps you test storytelling devices before committing to a final page layout. For beginners, starting with layout templates can be a practical first step.
Tools and workflow: frames, rulers, and 3D references
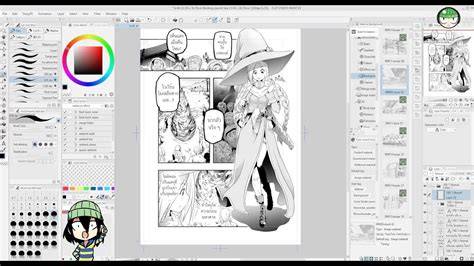
Clip Studio Paint provides a dedicated paneling tool that automatically creates panels as a layer folder and masks the rest of the canvas, so you don’t need to worry about drawing overspilling. The Rectangle Frame tool can create not only rectangles but also ellipses and other polygonal frames. The subtool options include Raster Layer inside frame, Fill Inside the Frame, Brush Size, and Brush Shape, with more options accessible through the Sub Tool Detail menu.
For irregular panels, the Polyline frame tool offers curves and straight-line options to shape the borders. To create a circular inset panel, select the circle icon in Figure options, choose Start from center, and ensure Fill inside the frame is checked to keep outlines within the panel. A layer mask around the outside of panels ensures you stay inside the current frame while switching between panels.
When moving or resizing panels, use the Object tool to adjust frame borders precisely. Hold SHIFT to constrain proportions. The dual tools and blue control points help you resize and rotate the panel; the red and white squares inside edges control points allow fine-tuning. Panels can be rearranged to support dynamic storytelling, and you’ll learn these techniques in next lessons that cover faster multi-panel creation.
Apps like Clip Studio Paint offer a robust paneling workflow, but some artists prefer hand-drawn borders on a single layer. Regardless of the method, you’ll sketch and draw inside each panel and follow your usual process for finishing the artwork. Thumbnails and mockups help you visualize the page before you commit to full-size work.
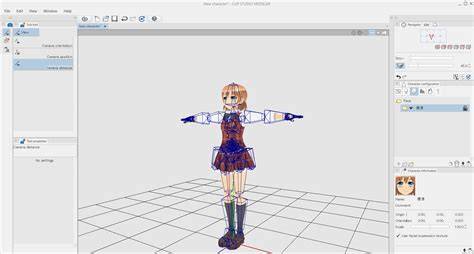
To speed up posing and perspective, 3D references are invaluable. You can load realistic 3D hand models and references for camera angles, backgrounds, and character poses. This helps you draw hands with varied poses and improves the quality and speed of your hand drawings. A specialized ruler tool assists with perspective and depth in backgrounds, and there are thousands of materials available monthly in Clip Studio ASSETS to match your style.
Line quality and inking: dynamic strokes for anime and manga
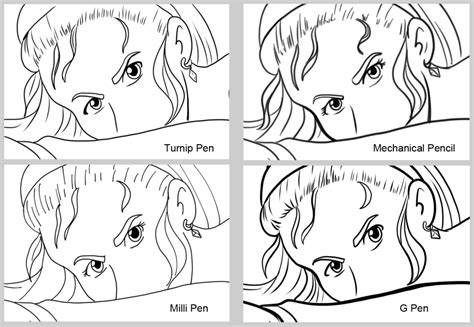
Line quality is essential for engaging line art. Pencil and pen tools reproduce realistic-looking lines, bringing your work to the next level. Draw neat, straight lines, curves, and shapes freehand, and pay attention to line weight to convey depth and emphasis. Thicker lines usually represent shadows, whereas thinner lines highlight lighter areas or distant objects. In black-and-white manga, light and shadow are expressed using screen tones rather than color. Screen tones come in varied dot and line densities to create different values, and in Clip Studio Paint you can apply screen tones by drag-and-drop onto the canvas.
Additionally, you can adjust expression color per layer-Monochrome, Gray, or Color-to create duotone or more complex shading effects. When working with monochrome, posting tones and gradient application can help achieve a natural, dynamic look. If tones are misapplied, moiré patterns can occur, which can be avoided by careful layering and tone management. Export options include PDF, EPUB, PSD, and PNG, and you can set margins and print marks so your work prints cleanly with proper trimming.
Character design, hair, eyes, and ears: anatomy for anime-style drawing
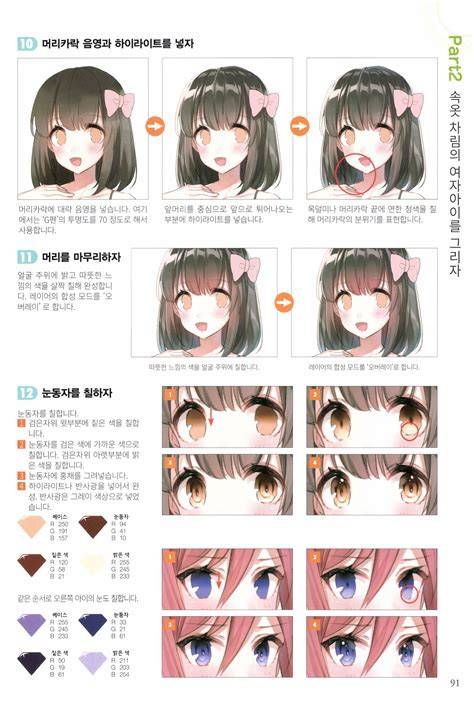
The Etherington Brothers show you how to draw rabbits and hares, and you can adapt their approach to study animal-like ears and features for character variety. Master drawing ears to create realistic characters, and learn to draw anime eyes like a pro. An anime-style coloring tutorial by Nicca helps you develop color strategies that enhance mood and expressiveness, while Esseyli’s hair tutorials guide you through hair flow and strand work that reads well in motion.
Customizable body shapes and camera angles make it easier to reference complex poses, and you can use detailed 3D hand models as references when drawing hands in various poses. If you’re aiming for a more stylized look, focus on line confidence and consistency to maintain a readable character throughout action sequences. For eyes, experiment with shape, lash thickness, and highlights to convey emotion and energy in your characters.
Color, lighting, and finishing touches: color manga and print considerations
Make your color manga illustrations stand out with vibrant eye colors and bold color schemes. When preparing for print, configure settings such as CMYK data export, color profiles, and print-ready margins. The software supports RGB for web and CMYK for printing, with a 3D print preview feature that helps you check page alignment and binding settings before finalizing a book. For webtoons, smartphone view and different screen ratios help you preview how pages read on mobile devices.
To ensure high-quality prints, use 300 DPI or higher for color work and 600 DPI for black-and-white work. Match the canvas size to your intended print dimensions, which could be a trade paperback size or A4, and consider the aspect ratio for page formats. When preparing for long-term projects, create at higher resolutions and export later to maintain flexibility for future print runs. A consistent palette and color management ensure that your finished book looks cohesive across pages and devices.
I Finally Cracked How Anime Studios Color Cels - Recreated the Process in Clip Studio Paint
From draft to finished manga: manuscript setup and workflow
Before creating a draft for your manga, draw a storyboard to outline the sequence of scenes and character actions. The New dialog and Layout settings in Clip Studio Paint help tailor your project to manga workflows, such as selecting A4 Monochrome (600dpi) presets for print-friendly pages. In EX, you can create a manga work containing multiple pages, manage chapters, and organize your pages efficiently. Expression color choices per layer-Monochrome, Gray, or Color-allow you to simulate various printing looks and tones across panels.
The process includes planning your story, designing characters with model sheets for consistency, and creating thumbnail layouts that map out page flow. When laying out pages, consider establishing shots, action-focused panels, and dialog pacing to balance storytelling. Dialog-preferably in all caps using a clean font like WildWords or Clip Studio Comic-should remain legible and consistent in size. Words per speech bubble should be kept concise to preserve readability and panel clarity.
Summary workflow: practical steps to start creating with Clip Studio
- Sketch thumbnails to plan panel layout and page flow, then refine into full-size panels.
- Use the Rectangle Frame tool for standard panels and the Polyline tool for irregular shapes; apply layer masks to keep drawing within panels.
- Inking: refine line weight, add depth with thicker outlines for shadows, and use screen tones for grayscale shading.
- Create character sheets and establish expressions and outfits to maintain consistency across pages.
- Prepare colors and tones; export in RGB for web or CMYK for print; preview across devices and print formats.
- As you gain experience, leverage 3D references for hands, poses, and complex perspectives to improve speed and accuracy.
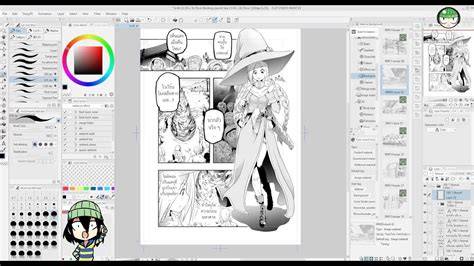
Now you know the basic steps to creating your comic or manga with digital tools, all that’s left is to start creating a story that you can be passionate about. As you become more familiar with panel layouts and the process of telling a story through sequential art, you will get more comfortable with the individual steps. It may help you to look at professional comic artists you admire and study their work. If you don’t have a digital comic creation tool yet, Clip Studio Paint is an excellent app for beginners and professionals alike.