Blending modes are an essential tool in Clip Studio Paint that alter how the colors on a blending layer interact with colors on lower layers. The default blending mode of a layer is Normal, and 100% opacity makes the layer opaque, so the layer beneath isn’t visible. This article compiles the main blending modes for layers, plus practical tips and workflow examples to help you achieve richer, more atmospheric artwork.
Overview of common blending modes
The Multiply mode multiplies the colors of the blending layer and the base layers, resulting in a darker color. The Color burn mode is named after the photography technique of “burning” prints to darken colors. The Screen mode inverts the base colors and multiplies with the colors of the blending layer, creating an effect opposite to Multiply. The Color dodge mode lightens the base colors and reduces contrast. The Add mode adds the color information of the base layers and the blending layer. The Overlay mode behaves like Screen in bright areas and like Multiply in darker areas. The Soft light mode’s effect depends on the density of the superimposed color. Using bright colors on the blending layer produces a brighter effect like dodge, while dark colors yield darker results similar to burn. The Hard light mode depends on the density of the superimposed color.
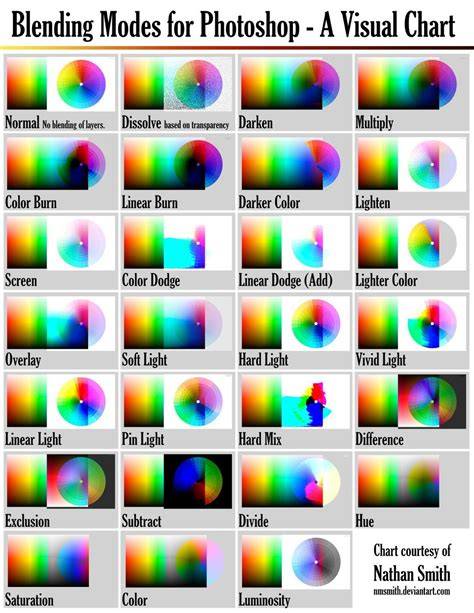
Practical examples and how to apply them
Consider a simple composition where you want to change the overall atmosphere of an illustration. Blending modes can add a whole host of effects to your work. For finishing touches, you can apply filters to adjust the look until you’re satisfied, including Perlin noise, Gaussian Blur, sharpening, color adjustments, and actions like RGB shift. An overlay layer with cool tones can push the image toward a cooler mood, while a slightly warmer overlay helps render skin tones more naturally. A Light or Dark overlay can emphasize light and shadow in your scene.
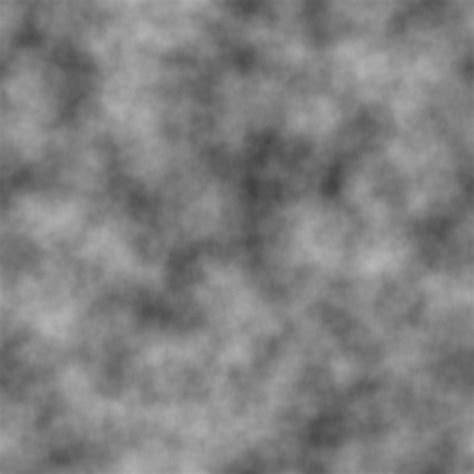
To blur specific areas with sharp edges, use the Lasso Selection tool set to Add to selection, blur the selected areas under Filter > Blur > Gaussian Blur, and then refine by erasing parts of the blurred region with an airbrush set to erase. The advantage of the Lasso tool is that you can achieve sharp edges on the blurred regions without over-blurring others. After blurring, you can apply Perlin noise via Filter > Render > Perlin Noise to introduce texture and subtle variation.
To adjust color and tone globally, add a Tone Curve correction layer (Layer > New Correction Layer > Tone Curve). Working in RGB, you can adjust red, green, and blue curves to affect shadows, midtones, and highlights. Dragging the control points lets you customize the scene's mood, increasing blue values for cooler tones or boosting dark values for more dramatic contrast. After these adjustments, a gentle Gaussian Blur followed by a slight sharpening can add a refined softness and detail to the drawing.
For finishing touches, chromatic aberration or RGB shift is popular. This can be achieved with an auto action or by using the liquify tool to shift color channels around edges. Masking and selective application help maintain control over where the effect appears, focusing attention on the center or other focal points.
If you’re blending color on the canvas, note that brush behavior matters. Some brushes blend color well by design, and you can enable Color Mixing in the Sub Tool Detail palette under Ink. You can specify the color mixing method (running color, blend, smear) for nuanced control. Brushes from the Clip Studio Assets store can also provide color-blending capabilities that suit your workflow.
Workflow tips for effective blending
1) Start with a base layer that establishes lighting and color direction, then add a blending layer to experiment with mood. 2) Use Overlay or Soft Light for natural lighting and subtle color casts, and switch to Multiply for deeper shadows. 3) Apply a separate adjustment layer (Tone Curve) to fine-tune the overall tonality without permanently altering the artwork. 4) Introduce texture with Perlin noise or Gaussian Blur on auxiliary layers, then adjust opacity to taste. 5) Save your work in .clip or .psd with layers preserved, and explore cloud storage for backups.
Notes on tools, finishes, and resources
Clip Studio Paint supports blending on raster layers only. It’s possible to blend pigment using brush tools with Color Mixing enabled in the Brush settings. You can also blend colors through color mixing values to achieve the desired level of blending. For motion and emphasis, consider using a few auto actions or assets from Clip Studio Assets store to automate repetitive finishing techniques like RGB shifts or subtle blur/sharpen combos.
Vector work in Clip Studio Paint benefits from native vector tools, Bezier curves, and snapping guides, which help keep alignment tidy as you apply blending effects and adjust color. Typography and text tools provide options for arranging text with circular or transformed layouts, which can complement blended artwork in graphic design projects.
Practical example: finishing a sketch with layered effects
Imagine finishing a sketch by adding an overlay layer with cool tones, applying a selective blur to edge areas, then refining colors with a tone curve. A light Perlin noise layer can introduce a subtle texture, and a final RGB shift enriches the focal center. This sequence demonstrates how blending modes, together with filters and adjustment layers, alter the overall impression while remaining non-destructive.
If you’d like a deeper dive, a video below provides a detailed walkthrough of blending techniques and their artistic outcomes.
The Power of Masking and Blending Modes in Clip Studio Paint!
Finally, remember that practice with various brushes and settings will help you determine what blending approach best serves your style. The key is to experiment with layers and modes, then refine with corrections and finishing touches to achieve your intended mood and clarity.
Related tools and considerations
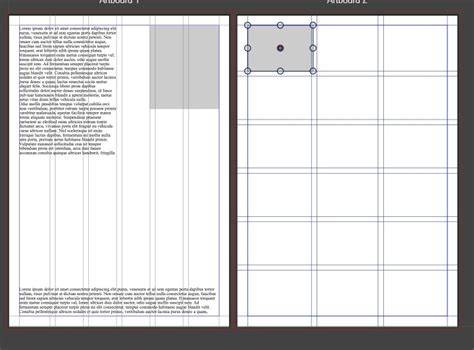
Digital design involves typography, alignment, snapping guidelines, and efficient file management. Align and Distribute tools help organize composition, while snapping to edges or centers ensures precise placement. Saving work with layer integrity and using cloud storage helps manage large design projects and backups.
- Understand blending modes and their visual outcomes.
- Experiment with overlays, adjustments, and textures.
- Use non-destructive edits (adjustment layers, masks).
- Incorporate textures and color shifts for depth.
- Save and back up frequently, leveraging cloud storage.