In this tutorial, we will walk you through both methods of exporting videos from DaVinci Resolve. DaVinci Resolve has a dedicated page for exporting projects called the "Deliver" page. To access this page, simply click on the rocket icon at the bottom of the DaVinci Resolve interface.
Getting to the Deliver Page and Understanding the Workspace
On the Deliver page, you can only view your project and cannot make any edits like you can on the Edit page. You can see the playhead (time marker) moving along the timeline, indicating the section that is currently being encoded. Timeline Viewer: Similar to the timeline viewer on other pages, this section provides real-time playback of the section currently being rendered/encoded. Render Queue: This is where your project appears before the encoding process begins. You can make some adjustments here.
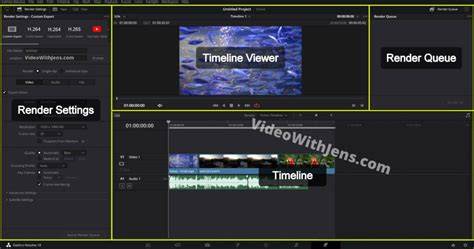
Setting Up Your Export: Quick Export vs. Custom Export
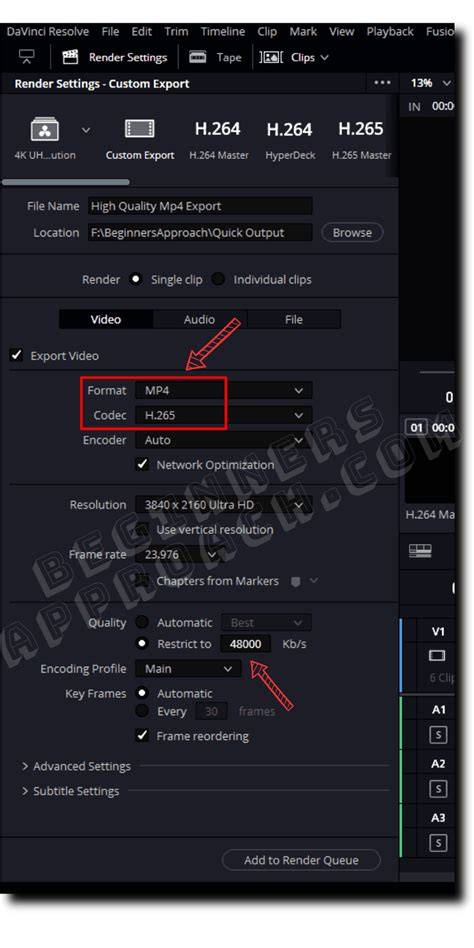
At the top of the Render Settings panel, you'll see icons similar to those in Quick Export. In the Quick Export settings window, choose the format in which you want to export your video. These options come with settings optimized for each platform. If you choose Custom Export and enter the Custom Export settings panel, the first thing you'll see is the Render settings.
Format refers to the container or file format in which your video will be exported. Codec is the setting that determines how your video is compressed. In general, selecting the MP4 format, H.264 codec, and a default resolution should suffice. Usually, the project resolution in the render settings matches the resolution of your project.
Single Clip vs. Individual Clips
If you choose Single Clip, your output file will be a complete video that includes all the clips and transitions on your timeline. If you choose Individual Clips, your output files will be multiple video files, with each file corresponding to a clip on your timeline.
Important Video and Subtitle Settings
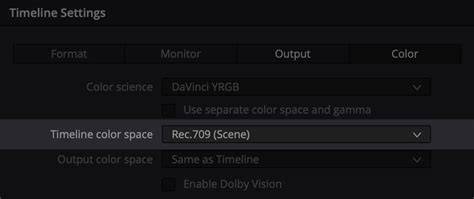
You need to make sure to enable the "Export Subtitles" option in the Video tab at the bottom of the Render Settings panel on the Deliver page. This issue may be related to the sampling. Regardless of whether you are a Mac or Windows user, you need to go to the Color Management section in the Project Settings panel and select "Rec.709-A" as the Timeline color space.
The Export Process: Baking It All Together
Click on Add to Render Queue, and then in the Render Queue panel, click on Render All to start exporting your video. H.264 HyperDeck is an export option optimized for HyperDeck Studio devices. It limits the bitrate to 100 Mbps to ensure compatibility with the device. These options come with settings optimized for each platform.
Blackmagic Design Hyperdeck Studio Mini H.264 Free Update - NAB 2018 Press Conference
Integrating External Hardware and Workflow Enhancements
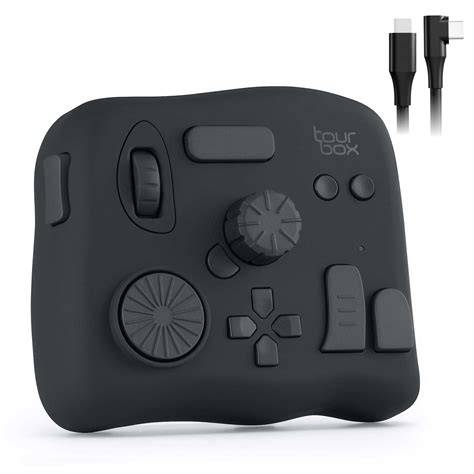
TourBox is a game-changing device designed specifically for creative professionals like you. By integrating TourBox into your DaVinci Resolve workflow, you can easily adjust settings, navigate timelines, and perform various editing tasks with just a few clicks and twists. TourBox also includes built-in features like HoverAdjust that give you the feel of a professional color-grading console. Incorporate TourBox into your DaVinci Resolve setup and experience a new level of control and efficiency in your video editing endeavors.
Tips for a Smooth Export
- Ensure the timeline resolution matches the project settings to avoid downscaling surprises.
- Use the Deliver page's Render Settings to tailor output for your target platform.
- Enable Export Subtitles if your project includes captions that should travel with the video.
Quick Reference: Step-by-Step Export Flow
- Open Deliver page by clicking the rocket icon.
- Choose Single Clip or Individual Clips in Render Settings as needed.
- Set Format to MP4, Codec to H.264, and confirm resolution matches project.
- Enable Export Subtitles in the Video tab.
- Adjust Color Management to Rec.709-A in Project Settings for consistency.
- Click Add to Render Queue, then Render All to start encoding.