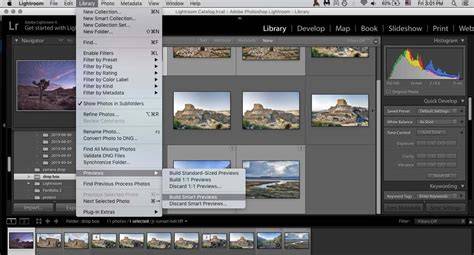
Lightroom generates its own jpeg previews based on the adjustment settings you apply, and when you import images, no settings have been applied yet. The images themselves are probably not blurry; what is likely is that your previews are blurry. First thing to check is what preview is saved. In the import screen, check the box up top that says "File Handling." The first option is "Build Previews." If you click on this, and it is set to minimal, just change that to one of the other choices. This only affects the preview. Once you click on a photo and enter the development module, the photo should be normal no matter what the setting you use for previews. The other likely thing going in is that you are looking at the images before the previews are built. The way to correct this is to wait until Lightroom imports and builds the previews.
Thanks. I am looking at images once all are properly downloaded. However I have the option for medium previews or full size. I had the medium checked off. Yes, previews are always JPEG images. A RAW image cannot be displayed because it's not an RGB image.
Almost every photographer has a photo they love that turned out just a little too blurry. Maybe the subject moved, the focus missed by a hair, or you grabbed the shot quickly on your phone in low light. This guide will show you how to make blurry photos look clearer in Lightroom using super resolution, denoise, sharpening, Clarity, Texture, masks, and a focused workflow specifically for blur.
Before you start editing, it helps to understand what kind of blur you are dealing with. Motion blur happens when the camera or subject moves during the exposure. This is common in low light, at slow shutter speeds, or when you photograph kids, pets, or movement. Soft focus occurs when the focus point is slightly off, or depth of field is extremely shallow. The subject might be mostly in focus, but features like eyes, hair, or small details look a bit soft. Photos taken with heavy digital zoom, cropping, or screenshots can look blurry because there are not enough pixels to support fine detail. In low light, cameras raise ISO to capture more light, which adds visible grain and noise. Noise can make edges look fuzzy and smear detail, especially in shadows and skin tones. Photos that have been texted, downloaded from social media, or exported multiple times at low quality will often show compression artifacts and a loss of detail. Lightroom cannot undo every kind of blur, but it can improve most soft or slightly blurry photos.
Before sharpening anything, make sure the photo has the right brightness and overall color. Correcting exposure and white balance first makes it much easier to see what kind of blur you are dealing with and how well sharpening is working. When a blurry image is also low resolution or heavily cropped, Lightroom’s Super Resolution tool can help. Noise and grain can make blurry photos look even worse, especially in low light. Once Denoise finishes, you’ll have a cleaner base image. Soft blur will be easier to evaluate, and sharpening will look more natural because it is not fighting against heavy grain.
For slightly blurry photos, small increases are usually best. Try staying in the +5 to +25 range for both Clarity and Texture. Clarity is especially useful for soft-focus images where the blur is distributed evenly. It is less effective on strong motion blur, where the blur has a pronounced direction. On Lightroom Mobile, you will find Clarity and Texture in the Effects panel. Sharpening is the core tool for making blurry photos look clearer. For blur, you want to sharpen edges and important details without exaggerating noise or creating strange halos. Hold the Option or Alt key while dragging the Masking slider. For slightly blurry photos, the Masking slider is critical. It lets you focus sharpening on what matters most: eyes, hair, clothing edges, and key lines in the scene. Often, a photo feels blurry because the viewer’s attention goes to the eyes and face first. If those features are a bit soft, the whole image feels less sharp. For portraits, zoom in and create an additional small mask over the eyes. This targeted sharpening makes the subject feel clearer and helps draw the viewer’s eye exactly where you want it.
Sometimes a photo looks blurry not because focus is wrong, but because the scene is low in contrast or affected by haze, fog, or backlighting. Dehaze is especially useful for outdoor images, backlit scenes, and landscape photos that feel soft because of atmosphere rather than focus. The more precisely you target your sharpening and clarity, the better your results will look. By sharpening only the areas that matter, you create the impression of a sharper photo overall, even if some parts of the image remain slightly soft. Our eyes interpret good contrast and depth as sharpness. Composition also affects how sharp a photo feels. Once you understand how to sharpen and clean up blur manually, presets and finishing collections can help you work faster and keep your edits consistent.
A common workflow is to apply your main aesthetic preset first to set the mood, then use a Photo Fix style or finishing preset as a final step. To speed up your editing workflow, you can use free Lightroom preset packs that target common issues in blurry or soft photos. It is important to remember that Lightroom has limits. The Photo Fix Collection is designed as a finishing touch for cleaner, more refined images. The Starter Bundle is a great choice if you want presets that brighten, clarify, and polish your photos without a complicated workflow. The All Access Bundle includes every preset collection and future updates in one place.
1. Start by correcting exposure and white balance, then use Super Resolution for low-resolution or cropped images, Denoise to smooth grain, and a combination of Clarity, Texture, and sharpening to bring back detail. 2. Lightroom can improve a slightly soft face using Super Resolution, targeted sharpening, and Subject masks, especially around the eyes and hair. 3. Super Resolution cannot remove blur, but it can double your image resolution and add more pixel detail, which makes slightly soft photos easier to sharpen. 4. It is usually best to set basic exposure and color first, then add a small amount of Clarity and Texture to build definition, and finally fine tune sharpening in the Detail panel. 5. Lightroom Mobile can help with mild blur by using the Clarity, Texture, and Sharpening sliders, and by masking to sharpen only the subject. 6. If you see bright halos around edges, rough or crunchy skin texture, or an overall “gritty” look when you zoom in, the sharpening is likely too strong. Lightroom cannot magically turn every blurry photo into a perfectly sharp image, but it can significantly improve soft, noisy, or slightly out-of-focus photos with the right tools and workflow. Once you are comfortable with these tools, presets and finishing collections can help you work faster and keep your edits consistent across every session.
Photos don’t always come out like you hoped. No matter the reason, no photographer likes blurry pictures. Blur happens; it’s just a part of photography. “Deblur” is exactly what it sounds like - it’s the process of removing blur from images. Every photo editor is different, but most include a way to deblur images. In Lightroom, you can find the image sharpening adjustment in the detail panel. Since deblur is so easy to use in most photo editors, it gives photographers the freedom to shoot without worrying about the focus being perfect every time.
Nothing is more frustrating than capturing a perfect moment only to find the photo turns out blurry. A picture usually loses its appeal when it turns out blurry. However, without fully understanding all of Lightroom's features, it can be pretty confusing. Part 1 explains why a picture turns out blurry after taking them. Part 2 covers fixing blurry photos in Lightroom with sharpening, clarity, and masks. Part 3 discusses dedicated photo repair software and other practical tips for sharper results.
Digital cameras can capture amazing details and textures, and you can use Lightroom to bring eye-popping sharpness and clarity to your images. Sharpen blurry images quickly with Adobe generative AI, the AI tool that powers the image sharpener in Lightroom. Select Auto in the Edit panel to create a custom correction for the image. Automatic adjustments will improve the image by raising or lowering the exposure, balancing the lighter and darker areas to reveal details, balancing color, and removing lens distortion. For control over your photo that goes beyond an AI image sharpener, make custom adjustments in the Effects tab. Moving the Texture slider increases or decreases the appearance of texture in the photo. Sliding to the right enhances medium-sized details, while sliding to the left diminishes those medium-sized details. If you’re editing portraits, use the Adjustment Brush tool to paint over features you want to smooth, like your subject’s cheeks and forehead, and move the slider to the left. Or you might do the opposite. Moving the Clarity slider increases or decreases the contrast of edge details in the image, especially in the midtones. For portraits, increase the clarity of your subject’s eyes by painting them with the brush and then sliding the Clarity slider to the right. Finally, to sharpen images, move the Sharpen slider. The Radius slider adjusts the thickness of the contrast edges, and the Detail slider determines the size of the details that get sharpened. The Masking slider controls where the sharpening is applied. Sliding all the way to the left applies the sharpening effect to the whole image, while sliding right sharpens only areas with well-defined edges. Learn how to sharpen images with Lightroom and pick up tips on sharpening images and making other photo edits from the pros. Remember, the amount of AI image sharpening you apply should be unique for each photo. Experiment with each of the controls and try using them in combination.