Turning discarded paintings into collage art is a unique and exciting process. Sometimes, a painting may lack direction or struggle to find a buyer, but it still holds beautiful brushstrokes that can take on a new life through collages. The best part? This painting was made in 2022 and the composition of the flowers were very off. It was a perfect painting for this project!
Getting Ready: Tools, Materials, and Setup
Before you even think about gluing anything down, let’s talk tools. Getting your materials together first makes the whole creative process so much smoother. Everything starts with your base-the canvas. This is the stage where your creation will come to life.
Stretched Canvas: This is what most people picture when they think of a canvas. It's fabric (usually cotton or linen) stretched over a simple wooden frame. Canvas Boards: These are a bit more rigid. They're made from canvas that’s been glued onto a firm board. A little pro-tip: some artists even use existing high-quality canvas prints as a starting point.
Now for the fun part! This is where you get to let your personality shine. You can use pretty much anything in a collage. Go beyond the usual magazine cutouts. Think about old letters, ticket stubs, scraps of fabric, or pressed flowers. A successful collage often feels like a curated collection of memories and inspirations.
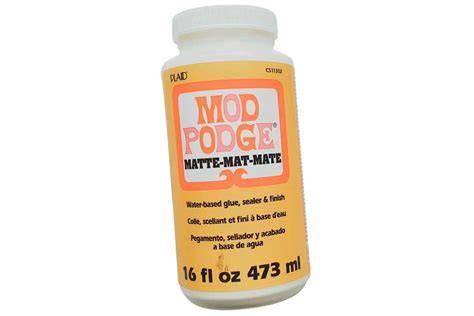
The glue you pick is more important than you might think. Deciding on an adhesive can be tricky since each one gives a different result. Acts as both a glue and a sealant. Adds body and transparency. Inexpensive and non-toxic. Provides an even, thin coat. Ultimately, your choice depends on the materials you're using and the final look you're going for. And one last thing-if you're using your own photos, make sure they're printed at a good resolution. There's nothing worse than a blurry, pixelated image ruining an otherwise beautiful collage.
Planning Your Composition
Okay, you've gathered all your materials. Now for the fun part-actually planning your piece. A truly great collage does more than just look cool; it tells a story. First, think about the overall theme or feeling you're going for. Are you trying to capture the chaotic energy of a city trip? The peaceful vibe of a garden? Maybe you're creating something nostalgic with old family photos.
Before you commit to anything permanent, always do a "dry run." Just lay your canvas on a table or the floor and start playing with your pieces. Move your elements around, see how they look when they overlap, and get a feel for how they interact. This process helps you find your focal point-that one key element that immediately grabs the viewer's attention.
A well-composed piece feels balanced, but "balanced" doesn't have to mean perfectly symmetrical. Think about it in terms of visual weight. You also want to consider how someone's eye will travel across the canvas. Color Harmony: To keep things from looking chaotic, try sticking to a limited palette of three to five main colors. Vary Your Shapes: Mix big, bold shapes with smaller, more intricate ones. Embrace Negative Space: Don't feel like you have to cover every single inch of the canvas!
If you want to see a masterclass in composition using simple shapes and bold color, explore the iconic cut-out techniques of Henri Matisse. His work is pure genius.
Executing the Collage on Canvas
Once you've mapped out your composition, it's time to bring your collage to life. This is the magical part-the hands-on process where all your ideas and materials finally come together on the canvas. First things first: prep your canvas. While you can work on a raw canvas, I always recommend priming it for a much better result. A thin, even coat of gesso creates a smooth, non-porous foundation. Another great option is to paint the canvas with acrylics. This creates a vibrant, colorful background before you even place your first piece, adding another layer of depth.
Not all collage materials are created equal, so they shouldn't be glued down the same way. For delicate items like tissue paper or magazine pages, wrinkles are your biggest enemy. To keep things smooth, apply a thin layer of your medium directly onto the canvas. Heavier elements demand a much stronger bond. You'll want to use a generous amount of acrylic gel medium. Tearing vs. shaping your paper elements can completely change the mood of your artwork. I almost always use a combination of both in a single piece.
Layering is what transforms a flat collection of images into a dynamic, interesting piece. It’s a core skill for anyone learning how to make collage art on canvas. A simple rule of thumb for effective layering is "thin to thick." Place your flattest, thinnest papers down first, and add bulkier, more textured items on top. Think about transparency and opacity, too. A piece of vellum or translucent fabric layered over a photograph can create a dreamy, ethereal effect. In contrast, placing a bold, opaque shape on top will make it pop right off the canvas. Keep experimenting-move pieces around, see how they interact, and don't glue anything permanently until you love how it looks.
You’ve spent all this time carefully arranging and gluing every perfect piece. Now it's time for the final, crucial step: protecting your creation. A good top coat does more than you might think. It shields your artwork from dust, moisture, and the fading effects of UV light. The sealant you pick will have a big impact on the final look and feel of your collage. Brush-On Mediums: Products like Mod Podge or acrylic varnishes are my go-to for most projects. You apply them with a soft-bristle brush, which gives you fantastic control and lets you really work the sealant into textured surfaces for a solid bond. Spray Sealants: An aerosol varnish is a lifesaver for delicate collages, especially those with 3D elements that a brush might knock loose. Let each layer dry completely before adding the next one. Don’t rush this stage. Your collage needs to be 100% dry before you even think about sealing it.
Once you've decided how you'll apply the sealant, you need to pick a finish. After your final sealant coat feels dry to the touch, you can go ahead and add any last-minute dimensional bits, like buttons or beads, using a strong craft glue. Then comes the hardest part: waiting for it to cure. This final step ensures your piece is ready to be displayed proudly or given as a heartfelt holiday gift. You did it. Your masterpiece is sealed, cured, and ready for its debut.
Display and Presentation
A handmade canvas collage is so much more than a craft project; it's a statement piece, a conversation starter, and a tangible collection of memories you poured your creativity into. Sometimes, the simplest approach is best. A single, well-placed collage can absolutely command attention on a mantelpiece, perched above a desk, or sitting on a floating shelf. Another fantastic option is to make your collage the anchor of a personal gallery wall. This is a super popular design choice that lets you mix your handmade art with framed photos, prints, and other meaningful objects.
Start Big: Place your collage (which is likely the largest piece) slightly off-center. Watch Your Spacing: Try to keep a consistent gap of about 2-3 inches between each frame. Handmade collage art on canvas makes for an incredibly heartfelt gift. The time and thought you put into picking and arranging every single element transform it into a deeply personal present, perfect for holidays like Christmas, or even anniversaries.
Collage in Education and Everyday Life
This idea of thoughtful curation is part of a bigger trend. The same hands-on approach you used to make your canvas collage is now influencing how people personalize their home decor, moving from walls to soft furnishings. Brands apply collage logic to textiles-upload photos into digital templates that get printed directly onto fabric. It’s a cool evolution of the same concept. The care you took choosing photos for your canvas can be used to design custom photo blankets, turning cherished moments into a warm, functional keepsake.
Tips, Variations, and Common Questions
Common questions often pop up: Which adhesives are best? For most of your paper and photo elements, you can’t go wrong with an acid-free PVA glue or a dedicated decoupage medium like Mod Podge. If you’re working with heavier, three-dimensional items like fabric, buttons, wood pieces, or beads, a strong acrylic gel medium is your best friend. Ah, wrinkles and bubbles are a classic collage frustration, but they’re preventable. Instead of slathering adhesive onto your delicate paper, brush a thin, even layer of glue directly onto the canvas. Carefully lay the paper down and immediately smooth it out, starting from the center and working your way to the edges.
Absolutely! Painting over parts of your collage is a fantastic way to unify all the different elements and add another layer of depth. You could apply a transparent wash of color to gently tint certain areas, or use opaque paint to introduce new patterns right on top. The most important rule? Always make sure your adhesive is completely dry before you pick up a paintbrush. And remember: collage and mixed media aren’t exactly the same. Collage uses adhered materials like paper or fabric, while mixed media is a broader term for artworks that use more than one medium.
In art education, collage is used to explore self and storytelling. A common approach is to have students create a self-portrait collage using colors, textures, magazine images, text, fabrics, photos, and personal items. This practice helps students think deeply about composition and narrative, linking memory and meaning with visual form.