Logiciel puissant et réputé dans le monde du graphisme, InDesign recèle de multiples possibilités et fonctionnalités. It allows for careful and precisely calibrated layouts of books, magazines, posters, and many other deliverables for print or web use. In this article, we focus on the Pathfinder function and how it enhances vector shaping within InDesign.
What is Pathfinder in InDesign?
The pathfinder in InDesign enables the creation of complex, unique graphical objects-useful for logos or flat 2D icons. This tool, found under the “Object” menu in the top bar, offers a submenu with actions such as addition, subtraction, intersection, exclusion of overlap, and front/back subtraction. In practice, Pathfinder influences how distinct graphic elements interact, allowing you to merge, separate, or blend shapes and colors. The Pathfinder in InDesign is also accessible via the shortcut Ctrl + Shift + F9 or via Window > Object and Layout > Pathfinder.
Formation resources, like Walter Learning’s InDesign course, provide a comprehensive exploration of the software, its tools, and its environment. The course includes many explanatory videos and real-time demonstrations, paired with practical exercises (e.g., turning a photo to black and white in InDesign) and workshops for creating posters, business cards, letterheads, and menus.
Pathfinder on Shapes
First, you can apply the Pathfinder tool to graphical shapes in a document. This means you can combine several shapes into one. For example, draw four circles in your workspace and unite them with Pathfinder to create a single shape. The Additions (Union) command merges all shapes while preserving the attributes of the front-most object. Conversely, Subtraction removes the front shape from the others, creating a cut-out effect or removing an background shape. You can also choose to keep or exclude the intersection between shapes.
In project management, text handling, printing prep, and advanced features, Pathfinder on shapes provides a flexible workflow to craft logos, icons, and decorative elements with precision. When working destructively, the Unite operation may produce a single appearance, but using non-destructive live compound shapes preserves editability. To keep elements editable after union, you can use the option to create a compound shape via Alt/Option-click.
When exploring the other pathfinder operations-Divide, Trim, Merge, Crop, or Exclude-the behavior shifts. Divide cuts shapes into pieces at their intersections; Trim removes areas of the background that are overlapped by the foreground; Merge behaves similarly to Trim but also removes strokes in some cases; Crop masks background shapes using the foreground shape; Exclude creates holes by removing the overlapping parts. The first four operations (Unite, Minus Front, Intersect, Exclude) are the live, non-destructive options, while the others can be destructive if expanded.
Pathfinder on Type and Outlines
Pathfinder can also be applied to text by turning characters into outlines. After outlining (Text > Create Outlines), the various Pathfinder options become available for the outlined shapes. This enables you to treat different portions of a character with distinct fills or to create unique typographic icons and badges. When outlines are converted, you can still edit individual subpaths within the compound shape, enabling flexible color and composition control.
Building an Icon with Pathfinder
InDesign’s Pathfinder proves especially useful for constructing two-dimensional icons. Use the different operations to experiment with tones and layouts, accommodating constraints and creative preferences. For example, create an icon by combining shapes, then adjust fill colors and strokes while maintaining editability through live compound shapes. You can also adjust precision values for paths (0.001 to 100 points) and opt to remove redundant points to tidy the resulting figure. If a mistake occurs, the Default button resets you to the starting point, and Ctrl + Z undoes recent actions.
For those seeking practical guidance, Virginie Sapolsky-Malat’s InDesign training walks through Pathfinder and other features step by step, helping you understand the graphic chain and composition setup with guides, rulers, and layers. Downloading a working file allows learners to follow along and practice pathfinding techniques in real-time.
Practical Tips and Common Workflows
Where to find Pathfinder? InDesign users often keep Pathfinder in the sidebar for quick access. If it’s not visible, open Window > Object & Layout > Pathfinder. The first icon-“Add/ Unite”-is frequently the most used, enabling you to combine multiple objects. To create a single, editable compound shape, hold Option (Alt on Windows) while clicking the Unite icon; this preserves editability of the individual shapes while acting as one object. This live compound approach lets you edit subpaths without expanding to a destructive state.
The pathfinder tool also supports non-destructive editing, which is invaluable for iterative design. For example, you can subtract front shapes to create holes or to carve out areas, then revert to the original shapes if needed. When working with colors and strokes, you can see how overlapping shapes influence the final appearance in Outline mode, confirming how paths are joined and how holes are created.
In practice, you might build a Pac-Man-like figure by combining circular shapes and subtracting a mouth. You can then use the group selection tool to access inner components without double-clicking into the group. This tool, along with the Direct Selection tool, makes it easy to adjust the mouth width or other features while preserving the overall structure.
Pathfinder in Illustrator vs InDesign
While much of Pathfinder content is shared with Illustrator, InDesign emphasizes practical layout and type-friendly workflows. For cross-program work, you may discover parallels in Pathfinder’s shape modes and truthfully, many designers leverage these tools to turn complex shapes into usable graphics within InDesign layouts. The core concept remains: combine, subtract, and refine shapes to achieve the desired form, whether for icons, logos, or decorative elements.
Example: Yin-Yang with Pathfinder
A common demonstration is constructing a yin-yang using Pathfinder. Start with two large circles, two smaller circles, and a dividing rectangle. Subtract the rectangle from one large circle to create a white half, then subtract the lower layer from the upper to form the black/white interplay. Add small dots and complete the composition with a final union. This example illustrates how Pathfinder enables layered, precise shape composition that would be cumbersome with freehand drawing alone.
Do you use Pathfinder regularly? If you’re new, try practicing with simple shapes first, then move to more complex composites. The tool’s versatility grows as you gain familiarity with the different modes and how they interact with fills and strokes.
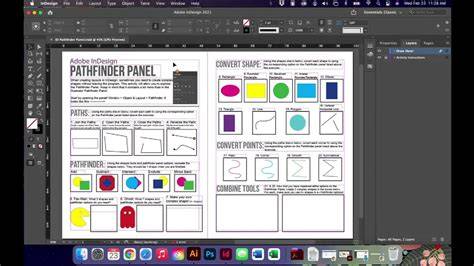
Using pathfinders in InDesign
In summary, Pathfinder empowers designers to create precise, editable, and visually compelling graphics within InDesign, whether you’re building icons, logos, typographic outlines, or decorative elements for print and digital media.
tags: #pathfinder #tool #indesign