When you change the opacity of a layer in Photoshop using the Opacity slider at the top of the Layers panel, the WHOLE layer changes to that opacity. There may be times though when you want only a small part of one layer to be transparent or semi-transparent. The trick is to firstly select the part of the layer that you want to adjust the transparency of and then make your adjustment. For this trick, you don’t use the opacity slider on the layers panel, but rather a Fill command from the Edit menu.
Step-by-step: isolating and making a selected area transparent
Open your image in Photoshop and make a selection around the area you want to change the Opacity on. For example, a quadrant-style picture or any subject you wish to affect selectively.
Choose Edit > Fill and set the Blending Mode to Clear. This method allows you to erase or make transparent only the selected portion without altering the rest of the layer.
If you need to refine which parts become transparent, you can use layer masks and brush tools to non-destructively hide or reveal areas. A layer mask hides the unselected parts of your layer rather than deleting them.
Additional methods and considerations for transparency
To isolate subjects and create transparent backgrounds, you can use tools in the Select and Mask workspace. Click Select Subject to let Photoshop detect the subject and create a selection, then refine with the Quick Select, Brush, and Lasso tools as needed.
The Magic Wand tool can help in selecting solid-color areas like white parts of an image, especially when used with the Contiguous setting and Blend If options for more precise transparency effects.
For permanent transparency, ensure you save in a format that supports transparency, such as PNG. If you plan to edit later, save as PSD to preserve layers and masks.
When preparing graphics for overlays, logos, or composite images, you may want to remove backgrounds entirely or make them transparent using Quick Selection, Refine Edge, and masking workflows.
Practical notes on blending and opacity
By default, the Opacity control affects the entire layer. To affect only a portion, use a layer mask or selection-based Fill operations. Blending modes (Normal, Multiply, Screen, etc.) change how transparency interacts with underlying layers, which can produce various visual results depending on the chosen mode.
Common workflows and tips
To remove a background and create a transparent subject, use the Select Subject tool, refine edges with Refine Edge, and apply a Layer Mask. Save as PSD for future editing or as PNG for distribution.
To make white areas transparent across a whole image, consider selecting whites with the Magic Wand, then applying a mask or Fill with Clear to reveal transparency where needed.
For batch work, you can script transparency changes or background removals across multiple images, using File > Scripts > Browse… to run your script.
In practice, the key idea is to select the portion of the layer you want to affect and use masking, Fill, or blending options to control transparency precisely, without altering the entire layer. This approach gives you flexibility and non-destructive editing paths for complex composites.
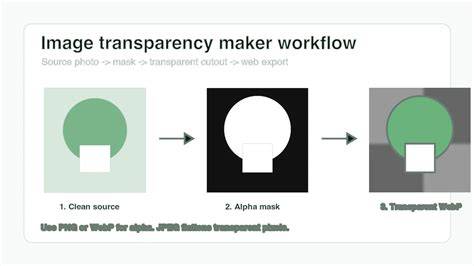
How To Make A Background Transparent In Photoshop
tags: #photoshop #make #selection #transparent