Learn the basics of drawing shapes using the shape tools in Photoshop! Covers the geometric shape tools which include the Rectangle, Ellipse, Triangle, Polygon and Line Tools. In this tutorial, I show you the basics of how to draw shapes using the shape tools in Photoshop. Specifically, we’ll look at how to use the geometric shape tools, which are the Rectangle Tool, the Ellipse Tool, the Triangle Tool, the Polygon Tool, and the Line Tool. Photoshop also includes a Custom Shape Tool for drawing more ellaborate pre-made shapes. Adobe has made quite a few changes to the shape tools in recent versions of Photoshop. So to follow along, you’ll want to be using Photoshop 2022 or newer. You can follow along with me by creating a new Photoshop document.
The shape tools in Photoshop are all found in the toolbar, nested together in the same spot. Click and hold on the Rectangle Tool's icon to open a fly-out menu showing the other shape tools hiding behind it. We'll look at each tool as we go along. The options for the active shape tool appear in the Options Bar. And most of the options are the same no matter which shape tool is selected. The tool icon on the far left of the Options Bar tells us which tool is active. But it's also how we reset the tool to its default settings. Next is the Tool Mode option where we choose which kind of shape we want to draw. Shapes in Photoshop can be drawn as either vectors, paths or pixels.
Vector shapes are drawn using points connected together by straight or curved lines, and they remain scalable and editable without ever losing quality. A path is also scalable and editable, but it's simply the outline of the shape without any fill or stroke. And a pixel shape is made of pixels, just like images. In most cases, you'll want to draw vector shapes. The Fill option is where we choose a color for the shape. The default shape color is black. Then choose the kind of fill you need using the icons along the top of the panel. If you choose Solid Color, Gradient or Pattern, then twirl open one of the preset groups and choose a preset by clicking its thumbnail. Then select a color from the Color Picker. I’ll choose a purple color by setting the H (Hue) value to 295 degrees, the S (Saturation) value to 70 percent and the B (Brightness) also to 70 percent.
The next two options in the Options Bar are for adding a stroke around the shape. By default, Photoshop adds a 1 pixel black stroke. Then use the icons along the top of the panel to choose from the same options we saw with the fill color. Or click the icon in the upper right corner to choose a custom stroke color from the Color Picker. Next, set the width or thickness of the stroke by entering a Size value. I'll set it to 16 pixels. As we'll see, all of these options (fill color, stroke color, stroke size and more) can also be changed from the Properties panel after we draw the shape. From here, you can set the stroke Type to either a Solid, Dashed or Dotted line. Solid is the default. Or change the stroke's Alignment to either Inside, Outside or Centered on the outline of the shape. A separate dialog box opens with most of the same options, but you can also create your own custom dashed or dotted line, and save your settings as a preset.
Next in the Options Bar are the Width (W) and Height (H) fields. But briefly, clicking the first icon, Path Operations, opens a list of ways to combine two or more shapes into a larger or more complex shape. The next icon, Path Alignment, opens all the ways to align or distribute multiple shapes. The next set of options are found by clicking the Gear icon in the Options Bar. First are the Path Options for changing the Thickness or Color of the path outline around the shape. But don't confuse a path outline with a stroke. Paths exist only in Photoshop and do not appear when you print your work or when you save it as a jpeg, png or other file format. These path options exist only to make the path outline easier to see while working in Photoshop. I'll increase the thickness to 2 px just to make the path easier to see as we go through this tutorial. Below that are options for setting a custom size or aspect ratio for the shape before you draw it, along with the option to draw the shape out from its center rather than from a corner. But I would avoid these options because they are sticky, meaning that they remain selected until you come back and choose a different one, which can quickly become annoying. Next is the Corner Radius option, which is only visible when the Rectangle Tool, Triangle Tool or Polygon Tool is active in the toolbar. Finally, the Align Edges option aligns the edges of your shape to Photoshop's pixel grid, which I covered in the Zooming and Scrolling Images tutorial.
Drawing the basic shapes
So now that we've gone through the shape options in the Options Bar, let's look at how to draw different kinds of shapes using Photoshop's various shape tools. We'll start with the Rectangle Tool which draws simple four-sided shapes. Click on the canvas to set a starting point for the shape, and then drag away from that point. As you drag, you won't see the shape's fill or stroke color. If you press and hold the spacebar on your keyboard while your mouse button is still down, you can drag the shape outline around the canvas to reposition it. Release your mouse button to complete the shape. In the Layers panel, the new shape appears on its own shape layer. And because the shape was drawn using the Rectangle Tool, Photoshop names the layer Rectangle 1.
To draw a perfect square with the Rectangle Tool, click to set a starting point for the shape and then begin dragging. Press and hold the Shift key on your keyboard to lock the shape's aspect ratio to a perfect square and then continue dragging. Release your mouse button to complete the shape, and then release the Shift key. In the Layers panel, the second shape appears on its own shape layer above the first. The Create Rectangle dialog box opens where you can enter a width and height for the shape, in pixels.
Tip! Instead of choosing the Path Selection Tool from the toolbar, you can access it temporarily from your keyboard by holding the Ctrl (Win) / Command (Mac) key. With the key held down, click and drag to move the shape. Tip! And here's a tip you can use when you've drawn multiple shapes in your document, each on its own layer, and you need to select individual shapes to move them around. Select the Path Selection Tool from the toolbar so you can access its options in the Options Bar. Then in the Options Bar, change the Select option from Active Layers to All Layers.
Earlier I mentioned that you can reposition a shape as you draw it by holding the spacebar on your keyboard, dragging the shape into place, and then releasing your spacebar to continue dragging out the shape. This works with any of Photoshop's shape tools. To draw a shape from its center rather than from a corner, click to set the starting point and begin dragging. Then hold the Alt (Win) / Option (Mac) key on your keyboard and continue dragging. Release your mouse button to complete the shape, and then release the Alt (Win) / Option (Mac) key. To delete a shape, click on its shape layer in the Layers panel and drag the layer down onto the Trash Bin. To reselect an existing shape in your document, click on its shape layer in the Layers panel. And if the shape was turned off, click its visibility icon to turn it back on.
Back in Photoshop 2021, Adobe added on-canvas controls to shapes. These controls appear around the shape after you draw it, and make it easy to scale, resize or rotate the shape without needing to use the Free Transform command. The on-canvas controls can also be used to adjust the roundness of a shape's corners. To resize a shape using the on-canvas controls, click and drag any of the handles (the squares that appear around the path outline). To scale the shape proportionally, hold the Shift key on your keyboard as you drag a handle. Just remember to release your mouse button first before releasing the Shift key. To undo the last transformation you made to the shape, go up to the Edit menu and choose Undo Transform Path. Or press Ctrl+Z (Win) / Command+Z (Mac) on your keyboard. To rotate a shape using the on-canvas controls, move your cursor just outside the path outline. Shapes can also be rotated around a corner or other location by moving the reference point. The reference point is the target icon that appears in the center of the shape by default. If the reference point is not visible, you’ll need to turn it on in Photoshop’s preferences. On a Windows PC, go up to the Edit menu in the Menu Bar. On a Mac, go up to the Photoshop menu. Then in the Preferences dialog box, select Show Reference Point when using Transform. You'll only need to do this once. And as a bonus, the reference point will now be visible not only with shapes but anytime you use Photoshop's Free Transform command. Click OK to close the dialog box when you’re done. Click and drag the reference point to a new location. And now when you rotate the shape, it rotates around the new point.
Live Shape, Properties, and Pathfinder
With the Rectangle Tool, all four corners can be rounded at once, or a single corner can be rounded independently. But shapes drawn with the Triangle Tool or Polygon Tool are limited to a single control that affects all corners at the same time. While the on-canvas controls are convenient, they're not the only way to adjust the appearance of your shape. A Live Shape means that after the shape is drawn, all of its properties remain live and editable. Since I currently have a rectangle shape selected, the Properties panel is showing options for a shape drawn with the Rectangle Tool. The Properties panel is divided into sections, and the first section at the top is Transform. In the Transform properties, you can edit the shape's Width (W) or Height (H), and click the link icon to link or unlink the width and height values. The X and Y coordinates can be used to set a specific location for the shape on the canvas. The Angle option sets the rotation of the shape. To reset the angle, enter a value of 0 degrees. Tip! The width and height, X and Y values, and the rotation angle can all be changed using Photoshop's scrubby slider. The Appearance section in the Properties panel holds options for changing the shape's fill color, the stroke color, the thickness of the stroke, and more. It’s also where we adjust the roundness of the corners. Click the Fill or Stroke color swatches to change the colors. Below the color swatches are more options for the stroke that are copied over from the Options Bar. Earlier we learned how to adjust the roundness of the shape's corners using the on-canvas controls. But you can also adjust the corner radius here in the Properties panel. By default, the four boxes (one for each corner) are linked together, so entering a new value for one corner changes all four by the same amount. Here I’ve changed the radius value of the upper left corner to 60 pixels. Below the individual boxes is a larger box that displays the current radius values for all corners at once. The first value is the top left corner, then the top right, the bottom right, and the bottom left. Finally, the Pathfinder section at the bottom of the Properties panel holds the same options for combining shapes that we saw earlier in the Options Bar. From left to right, we have Combine Shapes, Subtract front shape, Intersect shape areas, and Exclude overlapping areas.
Exploring the other geometric tools
At this point, we've covered most of the basics for drawing shapes in Photoshop. We know where to find the various shape tools in the toolbar, and we've looked at the options in the Options Bar, like choosing a fill and stroke color, which are mostly the same for each tool. But since the only shape tool we've used so far is the Rectangle Tool, let's take a quick look at Photoshop's other geometric shape tools. I won't repeat everything that's the same with each tool and that we've already covered. While the Rectangle Tool draws rectangles and squares, the Ellipse Tool draws round or elliptical shapes, including perfect circles. Other than that, both tools behave much the same. To select the Ellipse Tool, click and hold on the Rectangle Tool in the toolbar, or whichever shape tool you used last. Release your mouse button to draw the shape, and then drag any of the on-canvas control handles to resize it as needed. In the Properties panel, the Ellipse Tool shares the same editable Live Shape properties as the Rectangle Tool. The only properties missing are the corner radius options since they don't apply.
The Triangle Tool was first introduced in Photoshop 2021. Before that, drawing a triangle shape involved selecting the Polygon Tool (which we'll look at next) and setting the number of sides to 3. But we now have a dedicated Triangle Tool so you don’t need to remember that a triangle is just a 3-sided polygon. To select the Triangle Tool, click and hold on whichever shape tool appears in the toolbar, which will always be the last tool that was used. Like the Rectangle Tool, the Triangle Tool includes a Corner Radius option in the Options Bar which can be used to set the roundness of the corners before drawing the shape. Click and drag in the document to draw a triangle shape, or hold Shift as you drag to draw an equilateral triangle where all three sides are the same length.
While the Triangle Tool draws 3-sided shapes and the Rectangle Tool draws shapes with 4 sides, the Polygon Tool in Photoshop can draw shapes with as many sides as you need. It can even draw stars, as we’ll see in a moment. Along with the standard shape tool options in the Options Bar, the Polygon Tool also includes a box for entering the number of sides and for setting the corner radius. If you know the number of sides you need, you can set it here before drawing the shape. Click and drag in the document to draw the polygon shape. Just like the Triangle Tool, shapes drawn with the Polygon Tool include a single corner radius control at the top. Or you can adjust the radius from the Properties panel. You can change the number of sides for the polygon in the Properties panel. To turn your polygon shape into a star, lower the Star Ratio option in the Properties panel. I'll set the number of sides back to 5.
The last of Photoshop's geometric shape tools, and the final tool we'll look at in this tutorial, is the Line Tool. The Line Tool is used to draw straight lines, and you can add an arrowhead at either the start or end of the line. The Line Tool is different from the other shape tools in that the color of the line is actually controlled by the stroke color, not the fill color. Then use the icons along the top left of the panel to choose from a Solid Color preset, a Gradient preset or a Pattern preset. I'll click the Solid Color preset option. The weight, or width, of a line is controlled by the stroke size.
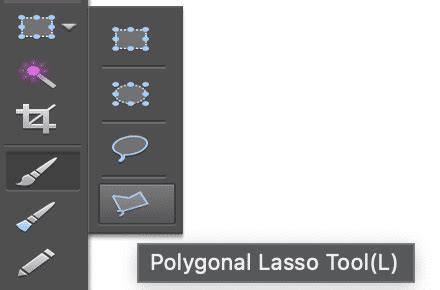
While you may, o... The Polygonal Lasso Tool, another of its basic selections tools, is a bit like a cross between the Rectangular Marquee Tool and the standard Lasso Tool, both of which we looked at in previous tutorials. It allows us to easily draw freeform selection outlines based on straight-sided polygonal shapes. By default, the Polygonal Lasso Tool is hiding behind the standard Lasso Tool in the Tools panel. To get to it, click on the Lasso Tool, then hold your mouse button down until a fly-out menu appears showing you the additional tools that are available. Once you've selected the Polygonal Lasso Tool, it will appear in place of the standard Lasso Tool in the Tools panel. Whichever of the three lasso tools you selected last will appear in the Tools panel.
Drawing selections with the Polygonal Lasso Tool is a lot like drawing straight-sided paths with the Pen Tool. Begin by clicking somewhere along the edge of the object or area you need to select, then release your mouse button. This adds a point, commonly called an anchor or fastening point, to the document. As you move the Polygonal Lasso Tool away from the point, you'll see a thin straight line extending out from your mouse cursor, looking a bit like a spider weaving a web, with the other end of the line attached to the anchor point. Click again to add a second point, then release your mouse button. Continue moving around the object or area, clicking to add a new point anywhere where the line needs to change direction, fastening the end of the line to each new point as you go along. Unlike the standard Lasso Tool, as well as many of Photoshop's other selection tools, there's no need to keep your mouse button held down as you move from point to point.
Once you've made your way around the object or area, complete the selection by clicking once again on the initial point you added. Photoshop will convert all of the straight lines into a selection outline. A small circle will appear in the bottom right corner of the cursor icon when you're close enough to the initial point to complete the selection. You can also close a selection simply by double-clicking anywhere with the Polygonal Lasso Tool. Here's a photo I have open in Photoshop showing a large blank billboard hanging on the side of a building. At first glance, you may think the billboard is shaped like a rectangle, so why bother with the Polygonal Lasso Tool when the Rectangular Marquee Tool should work just fine? Let's give it a try.
I'll press the letter M on my keyboard to quickly select the Rectangular Marquee Tool, then I'll click in the top left corner of the billboard to begin my selection and drag down to the bottom right corner. I'll press Ctrl+D (Win) / Command+D (Mac) to remove my failed selection outline. This time, let's try selecting the billboard with the Polygonal Lasso Tool. I'll grab the Polygonal Lasso Tool from the Tools panel as we saw earlier, then to begin my selection, I'll click in the top left corner of the billboard and release my mouse button. This sets my initial starting point for the selection. I'll move to the top right corner and click to add a second point. Photoshop joins the two points together with a thin straight line. I'll click to add a third point in the bottom right corner, then click to add a fourth point in the bottom left corner, fastening the straight line to each new point as I make my way around the billboard. Again, I'm not holding my mouse button down as I move from point to point. If you make a mistake and click to add a point in the wrong spot, there's no need to start over. Just press the Backspace (Win) / Delete (Mac) key on your keyboard to undo the last point you added. To complete my selection, I'll click back on the initial starting point for the selection in the top left corner of the billboard, then release my mouse button. I'll press Ctrl+A (Win) / Command+A (Mac) to quickly select the entire image, then Ctrl+C (Win) / Command+C (Mac) to copy it to the clipboard.
Not everything you'll want to select with the Polygonal Lasso Tool will be as simple as a four-sided billboard, but the steps are always the same. Here's a photo of an old building. I want to replace the sky in the photo, which means I'll need to select the sky, drawing part of my selection around the top and sides of the building. I'll begin my selection somewhere along the left side of the building by clicking to set my starting point, then I'll slowly make my way around the outside of the building, clicking to add points as needed. I'll zoom in a little to make it easier to see what I'm doing by pressing Ctrl++ (Win) / Command++ (Mac) a couple of times. To scroll the image around inside the document window, hold down your spacebar, which temporarily switches you to the Hand Tool, then click and drag the image to move it. Better lock your windows. As I make my way along the top of the building, I come across what appears to be a problem. Part of the design in the roof is actually rounded, which is bad news for the Polygonal Lasso Tool since it can only draw straight-sided selections. Fortunately, Photoshop makes it easy to switch between the Polygonal Lasso Tool and the standard Lasso Tool for occasions such as this. Simply hold down your Alt (Win) / Option (Mac) key, then begin dragging with your mouse. Once you've traced along the edge of the rounded or curved surface, release your Alt / Option key, then release your mouse button. Once I've finished drawing my selection around the building, I'll make sure I get all of the edge pixels in the sky along the sides and top of the photo by clicking with the Polygonal Lasso Tool into the gray pasteboard area around the photo. If you can't see the pasteboard area, press Ctrl+- (Win) / Command+- (Mac) a few times to zoom out until the pasteboard appears. I'm going to zoom back to the 100% zoom level by pressing Ctrl+Alt+0 (Win) / Command+Option+0 (Mac). If we look in my Layers panel, we can see that my document is made up of two layers. With the top layer selected, I'm going to hold down my Alt (Win) / Option (Mac) key and click on the Layer Mask icon at the bottom of the Layers panel. This converts my selection into a layer mask, and we can see that a layer mask thumbnail has been added to the top layer. Black areas in a layer mask are hidden from view in the document. If you don't like the weather in Photoshop, just wait a few minutes. In the example above, the selection outline disappeared when we converted it to a layer mask, but normally, when you're done with a selection created with the Polygonal Lasso Tool, you can remove it by going up to the Select menu at the top of the screen and choosing Deselect, or you can press the keyboard shortcut Ctrl+D (Win) / Command+D (Mac).
This video lesson, titled “Learn How to Use the Polygonal Lasso Tool in Adobe Photoshop Elements 2023: A Training Tutorial,” shows how to use the Polygonal Lasso Tool in Photoshop Elements. The Polygonal Lasso Tool in Photoshop Elements lets you draw straight-edged selections to make irregular polygonal selection shapes. To use the Polygonal Lasso Tool in Photoshop Elements, click the “Lasso Tools” button in the Toolbox. In the Tool Options Bar, be sure the “Polygonal Lasso Tool” is selected. Then click from point to point where you want to draw straight lines for your selection. Once again, you want to finish by clicking the initial starting point of the selection. A small circle appears next to the lasso tool’s mouse pointer icon when you are hovering over the selection’s starting point in the image. Like the Lasso Tool, if you hold down the “Alt” key on your keyboard when using the “Polygonal Lasso Tool,” you can draw a freehand line until you release the “Alt” key. You can create and save a Tool Preset for any tool, which will remember settings that you choose for that tool, so you can quickly and easily select different presets and settings for a particular tool. You can reset any tool back to its default settings by right clicking on the Tool Presets button and select Reset Tool. Pixels You can apply the Polygon tool directly to the pixels in the selected layer, but this will make changes directly to those pixels, which is destructive editing. Alternatively select the Path option in the Tool Mode, which you can turn into a selection, and then apply it to a Layer Mask. If the path creates a shape, i.e. Click to open the Fill Type and Color panel, shown below. A Stroke in Photoshop is an outline. You can adjust Stroke Width either with the dropdown size box and the slider, or directly, using the Scrubby Slider (highlighted in red). Move the cursor over the word "Stroke" and watch for the cursor to change to a hand+arrows. Click and drag to the left to decrease, or to the right to increase the width of the stroke. The Stroke options are highlighted in green. Caps: Caps are the beginning and end of a line. More Options: You can also select the above 3 options in More Options. This shows width and height and you can adjust them here, if you need a specific size. Shapes interact in the same way as selections interact. For examples of how selections interact, see Selections Interactions. Bring Shape Forward brings a shape forwards, so it is in front of the next shape. Send Shape Backward Sends a shape backwards so it is behind other shapes. Set your preference for the path color and thickness for the visible path, while your work.
There you have it - a thorough tour of Photoshop's shape tools, their live properties, and the ways to manipulate and combine shapes for complex compositions. Use these tools to build vector-like shapes that remain editable and scalable, while staying non-destructive and flexible within your workflow. Remember that many settings can be adjusted later in the Properties panel, so you can experiment freely during creation and refine as needed.