Scanning images directly within Photoshop is a powerful way to maintain control over your digital workflow and achieve unique artistic results. Many designers and photographers prefer doing their scanning from inside Photoshop, since it offers a fuller range of control than most scanner software. This approach allows you to interpret RGB data extremely well and integrate scanned images seamlessly into your projects. In this comprehensive guide, we will explore how to create a photo scan effect in Photoshop, as well as detailed instructions on the best practices for scanning directly from your device, troubleshooting common issues, and using alternative methods with macOS and Windows platforms.
Creating a Scan Effect in Photoshop for a Nostalgic and Vintage Look
Transforming any image into the look of a scanned photograph is simpler than it might seem. In just a few steps, you can add a nostalgic or vintage touch to your projects, creating illustrations with a retro feel or designing album covers and posters with a unique aesthetic. To achieve this effect, start with your image in Photoshop and follow these steps:
- Ensure your image layer is active.
- Go to Filter > Blur > Motion Blur. Adjust the angle and distance to mimic the slight smudges or streaks typical of scanned photographs.
- Next, add a new adjustment layer by navigating to Layer > New Adjustment Layer > Brightness/Contrast. Slightly decrease brightness and increase contrast to mimic the imperfections of a scanned image from the 90s or 2000s.
- Optionally, add texture overlays or noise to enhance the authentically digitized feel, capturing the textures and imperfections inherent in older scanned photos.
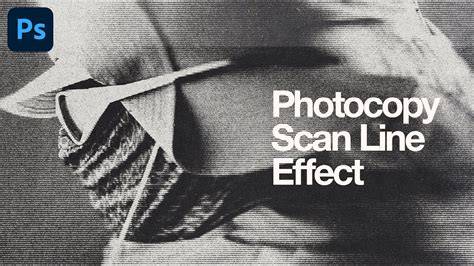
These adjustments can be fine-tuned to match the specific vintage or textured look you desire, making your digital images resemble scanned photographs with charming imperfections.
Using Photoshop to Scan Images from Your Device
Many users prefer performing their scans within Photoshop because it offers a more comprehensive control over the resulting image. The process involves connecting your scanner, launching Photoshop, and importing images directly into the program for editing and processing. Here's how to set up and troubleshoot this workflow for both Mac and Windows platforms.
Scanning in Photoshop: Basic Procedure
- Turn on your scanner and ensure that the latest scanner drivers and software are installed and compatible with your operating system.
- Open Photoshop and scroll down the FILE menu to IMPORT.
- Choose either the TWAIN option or the specific name of your scanner from the list.
- The scanner should launch its interface within Photoshop, allowing you to preview and adjust scan settings such as resolution, color mode, and size.
- Start the scan, and the image will load into Photoshop for further editing.
Addressing Compatibility and Driver Issues
Upgrading operating systems or Photoshop versions can sometimes cause scanning issues due to driver compatibility or software limitations. For instance, in 2010, when upgrading from CS3 to CS5 and Snow Leopard, some users encountered problems with scanning from within Photoshop. The key steps to solve these problems include:
- Ensuring that the scanner’s latest TWAIN-compliant drivers and software are installed. Without current drivers, preview images may not appear, or scans may be of lower quality.
- Setting Photoshop to run in the appropriate mode to handle your scanner’s driver architecture. For CS5, this often involved opening Photoshop in 32-bit mode via Get Info on Mac or corresponding settings on Windows.
- On macOS Yosemite and later, installing the TWAINBridge application is necessary for Photoshop to recognize your scanner’s TWAIN plugin. It’s recommended to save TWAINBridge.app from your Mavericks system folder before upgrading.
Alternative: Using Image Capture and WIA
In newer macOS versions, the traditional TWAIN driver approach is becoming outdated. The new standard is the ImageKit framework, which simplifies scanning through the Image Capture application. To scan images directly into Photoshop using this method:
- Navigate to File > Import > Images from Device. This action will launch Image Capture.
- Configure your scanning settings - such as resolution, color or black & white mode, and output format.
- Set the option to load the scanned image directly into Photoshop. This ensures the image appears immediately in your workspace for editing.
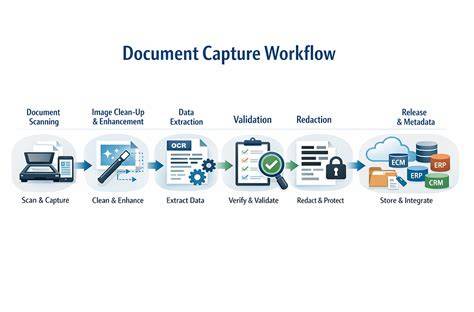
For Windows users, TWAIN is supported in Photoshop CS6 only in 32-bit mode. When running Photoshop in 64-bit mode, the WIA (Windows Image Acquisition) interface should be used if available, although it may be less flexible than TWAIN. Consulting your scanner’s manufacturer for compatibility with WIA or alternative drivers is recommended.
Handling Upgrades and Compatibility
When upgrading your operating system or Photoshop version, additional steps are often required to ensure smooth operation. For example, after upgrading to macOS Yosemite, it’s essential to reinstall the latest scanner drivers, support software, and the TWAINBridge application, if applicable. On Windows, remember that TWAIN is only supported in 32-bit mode; thus, switching Photoshop’s mode is necessary for seamless scanning.
Future of Scanning in Photoshop
Since the demise of the traditional TWAIN plugin in newer Photoshop versions, the ImageKit framework has become the new standard. As a result, the Image Capture tool is increasingly the preferred method for importing images from scanners and cameras on macOS. Adobe recommends transitioning away from TWAIN and exploring other industry-standard frameworks and workflows.
How To Scan Images Into Photoshop
Ultimately, understanding your device compatibility, system environment, and software options allows you to optimize your scanning workflow in Photoshop, whether for creating nostalgic photo effects or digitizing physical artwork with maximum control and quality.