Blending sliders in Photoshop are a powerful tool for removing solid white or black backgrounds from images, creating areas of transparency. To use blending sliders, open the Layer Style dialog box and locate the sliders in the “Blend If” section. While blending sliders are most effective for removing white or black backgrounds, they can also be used to remove other color backgrounds to some extent.
What are the blending sliders and where to find them
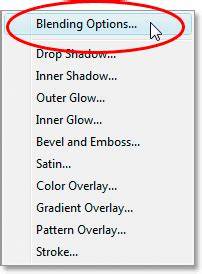
There are two sliders, “This Layer” and “Underlying Layer.” By dragging these sliders, you can make the darker or lighter areas of your layer become transparent, allowing the layers beneath to show through. You can access this by right-clicking on a layer and selecting “Blending Options.”
At the bottom of the resulting dialog box, you’ll see two pairs of sliders-one set for the This Layer bar and another for the Underlying Layer bar. Each of these sliders lets you make parts of your image transparent based on the brightness value of the pixels. The left slider represents the shadows (blacks) in your image and the right one represents the highlights (whites).
How to remove a black background
If the background of your currently active layer is black and the subject is much brighter, you can hide the black part by dragging the shadow slider (the one on the left) toward the middle until the black part is transparent. As you drag, you’ll see the black areas disappear and the checkerboard pattern (or underlying layer) appearing.
For solid black backgrounds, focus on the left (shadow) slider in the This Layer section and adjust until the background becomes transparent. If needed, fine-tune with the right (highlight) slider to clean up edges and avoid halos.
Fine-tuning for cleaner results
To fine-tune the blending sliders, you can split them into two by holding down the Alt key (Option key on Mac) and dragging. This creates a smoother transition and can help to avoid harsh edges or artifacts. Experiment with different slider positions to achieve the best result.
If blending sliders don’t completely remove the background, continue adjusting the sliders and consider additional cleanup tools. The Eraser, Clone Stamp, or Healing Brush can be useful for removing remaining artifacts.
Limitations and alternatives
For more complex backgrounds, this method may not work well. In such cases, tools like the Magic Wand, Quick Selection, Lasso, or Pen tools, as well as the Background Eraser and Select and Mask workspace, are often more suitable. You can also use the Magic Eraser or direct selection and deletion for quicker results on solid-color backgrounds.
Batch processing with blending sliders is not supported in Photoshop; each image needs to be processed individually. However, you can automate a sequence of steps with Actions for batch background removal, or use other batch processing software.
Practical tips and variations
Blending sliders are particularly useful for removing white or black backgrounds, but they can also be used to remove other color backgrounds to some extent. For more precise removal of non-black/white backgrounds, combining blending sliders with other selection tools can yield better results. You can also save a Layer Style after adjusting the sliders to apply the same settings to other layers.
Blending sliders can be used on text layers as well, enabling creative effects by blending text with underlying layers.
Related tools and workflows
Beyond blending sliders, Photoshop offers several approaches to background removal, such as the Magic Wand, Quick Selection, Lasso, and Pen tools, along with the Select and Mask workspace. Each tool has its strengths depending on image complexity and edge quality.
Blending Modes - Photoshop for Beginners | Lesson 5
For more complex editing needs, you might explore a workflow that involves combining channel calculations, masks, and layer styles to optimize transparency and edge quality, as some advanced users do to achieve smoother results.