Inkscape text on a path involves converting a text object into a path for editing, which is a non-reversible process that removes the text memory. The standard workflow starts by creating text, then converting it to a path, and finally ungrouping and combining as needed to manipulate the individual letter shapes. This article compiles the key steps and practical adjustments discussed by users in a forum-like exchange to help you achieve precise curved text formations.
Converting text to paths and initial grouping
The tutorial states: The text, stored as a text object, needs to be converted to a path object for editing. This process is not reversible and the text will lose its memory of being text. To convert the text to a path, select the text with the Select Tool and use the Path → icon Object to Path (Shift+Ctrl+C) command. Each letter is converted into a separate path and all the paths are placed in a Group (when objects are in a Group they can be manipulated as if they were one object).
This is normally a good thing, but for our purposes it would be better if all the letters were not grouped and were composed of one path. So, with the text selected, use the Object → icon Ungroup (Shift+Ctrl+G) command to remove the group and then Path → icon Combine (Ctrl+K) to combine the paths. When it gets to converting the text to a path, things quit working the way that they should.
In practice, you may encounter a status bar message like TEXT (New time roman 144 px) in Layer 1. When you go to Path - Object to Path or (ctr-shft-C) the status bar may say Group of 4 objects in Layer Layer 1, and you might not reach the Nodes. This can happen even after following the documented steps for conversion and ungrouping.
Dealing with paths on a circle: circular text alignment
A common scenario is text following a circular path. The approach involves working with two circles as baselines: one for the top text and another for the bottom text. Create a half circle to guide the bottom text by forming a full circle and then cutting it into a half. An alternative and more elegant method is to take the outer circle, convert it to a path, cut the top path node into two and delete the halves to end up with a clean half circle. Both methods aim to produce a stable baseline for the curved text.
To keep the circle as a usable reference, you can make it perfect by holding Ctrl while creating it. After creating the circle as an object, you can click its handle to convert it into a perfect half circle, place it where you want, and then perform Path → Object to Path. Some users keep an extra half circle on a hidden layer, ready for reuse in case of mistakes.
As another approach, you can reverse the direction by selecting the path and using Path → Reverse, which is useful if the text is on a path that runs in the opposite direction from what you want. Note that reverse applies to paths, and for some cases you might need to convert shapes to paths first before reversing.
Practical alignment and spacing considerations
Two core considerations when aligning text to a curved baseline are the alignment of upper and lower text and the spacing between letters. Some users describe configuring the spacing to spread letters a little wider using the text tool’s controls, which helps prevent crowding on tight curves. Adjusting the letter distance can be crucial for achieving an even visual rhythm along the curve.
Manual adjustments may still be needed because what counts is the bottom left border of the text and the angles of individual letters. Letters bend in different directions, so symmetry cannot be assumed. Inkscape does not automatically infer the exact intent, so you may need to fine-tune each letter or segment to align both top and bottom text along their respective baselines.
Tips and practical workflow refinements
- Keep an extra half circle on a hidden layer as a ready reference for quick reuse during the process.
- After converting to a path, if the text was grouped, ungroup and then combine paths to form a single path when appropriate for your design.
- When text must follow a circular path with top and bottom halves, consider making two separate baseline curves and adjust the text on each to avoid crowding and misalignment.
- If the text on a path needs reversal, apply Path → Reverse to correct the orientation, and, if necessary, convert the guiding circle to a path first for compatibility.
Illustrative considerations: what to expect in practice
The discussed exchanges emphasize that achieving clean curved text often requires a mix of converting text to paths, ungrouping, combining, and then carefully adjusting the letters' positions and angles. Depending on the exact font, path, and curvature, you may need to manually position letters to maintain readability and visual balance.
Applied examples: common scenarios
- Text on a single circular baseline: convert text to path, align to circle, and adjust letter spacing for even distribution.
- Bottom text mirroring top text on a circle: use a second baseline, align inversely, and tweak angles for symmetry.
- Half-circle text: create a full circle, convert to path, split the top path into two halves, delete the unwanted halves, and fit text to the resulting half-arc.
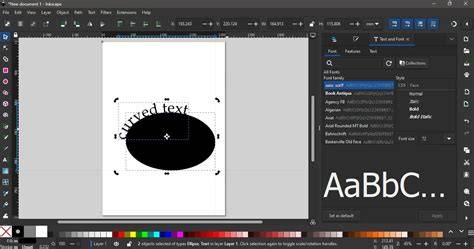
Inkscape Basics: Wrapping Text Around A Circle
As noted in user discussions, the reverse method, how to handle halves, and spacing adjustments can be iterative and require manual tweaking. The Inkscape manual provides a thorough explanation of many of these techniques, and practical experimentation with your specific fonts and sizes often yields the best results.